Difference between revisions of "2024 DOCK tutorial 3 with PDBID 1Y0X"
Stonybrook (talk | contribs) (→Final Steps) |
Stonybrook (talk | contribs) (→Creating the Protein Binding Site Surface) |
||
| (7 intermediate revisions by the same user not shown) | |||
| Line 77: | Line 77: | ||
[[File:1y0x model loop.png |center]] | [[File:1y0x model loop.png |center]] | ||
Choose the structure with the lowest zDOPE score and save that model as your working protein file. | Choose the structure with the lowest zDOPE score and save that model as your working protein file. | ||
| + | [[File:1y0xmodeled loop.png|center]] | ||
===Preparing the Protein file=== | ===Preparing the Protein file=== | ||
| Line 104: | Line 105: | ||
[[File:1y0xaddcharge.png|center]] | [[File:1y0xaddcharge.png|center]] | ||
Click on OK and once the program is finished the bottom left hand corner will tell you what the total charge of the structure is. This number should be an integer. Your protein structure is now completely prepped and ready for docking. Save the protein into 2 files: | Click on OK and once the program is finished the bottom left hand corner will tell you what the total charge of the structure is. This number should be an integer. Your protein structure is now completely prepped and ready for docking. Save the protein into 2 files: | ||
| − | + | protein_final.pdb | |
| − | + | protein_final.mol2 | |
===Preparing the Ligand File=== | ===Preparing the Ligand File=== | ||
| Line 113: | Line 114: | ||
#Add charged to the ligand file | #Add charged to the ligand file | ||
#Save the ligand file in 2 formats .pdb and .mol2. | #Save the ligand file in 2 formats .pdb and .mol2. | ||
| − | + | ligand_final.pdb | |
| − | + | ligand_final.mol2 | |
The ligand file should look like this when you are done: | The ligand file should look like this when you are done: | ||
[[File:1y0x ligandbefore.png|center]] | [[File:1y0x ligandbefore.png|center]] | ||
Double checking the hydrogen position by going to PDB and look at their 2D structure under Small Molecules: | Double checking the hydrogen position by going to PDB and look at their 2D structure under Small Molecules: | ||
[[File:Ligand in pdb 1y0x.png|center]] | [[File:Ligand in pdb 1y0x.png|center]] | ||
| − | + | === Final step === | |
| − | Finally, move your prepped protein and ligand files into subdirectory 001. | + | Finally, move your 4 prepped protein and ligand files into subdirectory 001.structure |
=Creating the Protein Binding Site Surface= | =Creating the Protein Binding Site Surface= | ||
| − | + | DOCK algorithm works on works by indetifying spheres around the protein surface, so we need to generate these surface and spheres parameter files for the docking process. | |
===Creating the Required Surface (DMS) File=== | ===Creating the Required Surface (DMS) File=== | ||
| + | In Chimera, open the protein_final.pdb file, | ||
| + | #Actions | ||
| + | #Surface | ||
| + | #Show | ||
| + | Your protein should look like this with the van der waals surface displayed. | ||
| + | [[File: 1y0xsurface.png|center]] | ||
| + | Now you can generate the dms file by: | ||
| + | #Tools | ||
| + | #Structure Editting | ||
| + | #Write DMS | ||
| + | You should get a file like following | ||
| + | protein_surface.dms | ||
| + | [[File:1y0x dms a.png|center]] | ||
| + | Double check by opening a fresh session of Chimera and open both the protein_final.pdb file as well as the protein_surface.dms file and make sure that the surface is generated around the protein structure. | ||
===Generating Spheres for the Binding Site=== | ===Generating Spheres for the Binding Site=== | ||
| + | Now that we have a .dms file, we need to turn it into something that DOCK recognize (spheres) using a program called sphgen. This program is run on the command line on Seawulf. | ||
| + | First the .dms file need to be in the 002.surface_spheres directory. | ||
| + | Now you can make a script to generate the spheres: | ||
| + | vi INSPH | ||
| + | In the Vi interface, insert the scripts as follows: | ||
| + | protein_surface.dms | ||
| + | R | ||
| + | X | ||
| + | 0.0 | ||
| + | 4.0 | ||
| + | 1.4 | ||
| + | protein_spheres.sph | ||
| + | Now you can run that script using the command below: | ||
| + | sphgen -i INSPH -o OUTSPH | ||
| + | Double check if the spheres are generated properly by opening the output file protein_spheres.sph that appears in our directory in Chimera, it should look similar to this: | ||
| + | [[File:1y0x all sphere.png |center]] | ||
===Binding Site Spheres=== | ===Binding Site Spheres=== | ||
| + | You can select the spheres around the binding sites only for DOCK to work with using the command below in Seawful: | ||
| + | sphere_selector protein_sphere.sph ../001.structure/ligand_final.mol2 15.0 | ||
| + | The script above will select spheres that are within 15 Angstrom to the ligands so that docking can be carried out within these boundaries. | ||
| + | When this program has successfully completed you'll see a new file in your directory called selected_spheres.sph. This file generated spheres which should line up with the binding site of the protein. We need to verify this in Chimera. | ||
#scp selected_spheres.sph to your local computer | #scp selected_spheres.sph to your local computer | ||
| − | |||
#In Chimera open selected_spheres.sph | #In Chimera open selected_spheres.sph | ||
| − | #In the current session, open the | + | #In the current session, open the protein_final.pdb |
#You should see the spheres located within the binding site of the protein, similar to: | #You should see the spheres located within the binding site of the protein, similar to: | ||
| − | + | We should also verify that the spheres are actually where the ligand is. Let's do this by selecting the spheres, hiding them from view, and verifying the ligand is in the same location: | |
#Hold down ctrl and click on a sphere | #Hold down ctrl and click on a sphere | ||
#Press the up arrow until all spheres are selected | #Press the up arrow until all spheres are selected | ||
#Actions → Atoms/Bonds → hide | #Actions → Atoms/Bonds → hide | ||
#Verify the ligand is where the spheres were | #Verify the ligand is where the spheres were | ||
| − | + | [[File:1y0x sel sphere.png|center]] | |
| + | and we see the ligand is where the spheres were so we can be confident in our work so far. | ||
=Box and Grid Generation= | =Box and Grid Generation= | ||
Latest revision as of 14:10, 18 March 2024
Contents
- 1 Introduction
- 2 Setting up
- 3 Preparation of the ligand and protein
- 4 Creating the Protein Binding Site Surface
- 5 Box and Grid Generation
- 6 Energy Minimization
- 7 DOCK
- 8 Virtual Screening of a Ligand Library
- 9 Cartesian Minimization of Virtually Screened Small Molecules
- 10 Rescoring and Ranking Virtually Screened Molecules
Introduction
Proteins are mechano-chemical machines that governs many functions in cells and can caused serious diseases to human when malfunction. One active branch of protein research involves the design of small molecules that can bind to proteins at designated positions and inhibit/alter/modulate the function of the protein in a desirable manner. DOCK is a wonderful tool to be utilized to perform virtual screening. Screening refers to experimentally test how the protein behaves when in contact with another molecule. This step is, traditionally, a very long and costly journey to figure out the compounds that binds and alter protein function. With the help of molecular docking package like DOCK, we can carry out virtual screening (scanning for molecule that binds protein) from thousands of molecules in the library and identify the hits in just hours. These hits can then be confirmed with experiments and subject to more advanced cytotoxic and pharmaco-dynamic test and maybe refined further.
In this tutorial, you will need to have access to DOCK6.10, molecule visualization software (preferably Chimera), and text editor software (Vi or Vim in Linux).
Aside from that, you will also need access to Stony Brook supercomputer cluster and the class workspace where they hold the parameters and library files. Please contact Dr. Robert Rizzo for more information about this.
Below are the steps that will be followed:
- Setting up
- Preparing the protein and ligand
- Finding the binding site of the protein
- Generating the grid
- Ligand energy minimization
- Perform 3 common types of molecular docking
Learning Objectives
By following this tutorial, you will be able to successfully reproduce the docking result of the demonstrated case of 1Y0X and understand the fundamentals of virtual screening using DOCK6.10. Applying the same method illustrated in this tutorial for other protein system will likely yield meaningful results but there might be some slight fine tuning from case to case.
Setting up
Setting up your environment
You need to have a designated and organized directory for this tutorial so that you can call up files that you want whenever you need to. To do so, you need to set up a directory and create sub directories similar to shown below.
To create a directory in Linux, you can type:
mkdir INSERT-NAME
Getting your protein PDB file
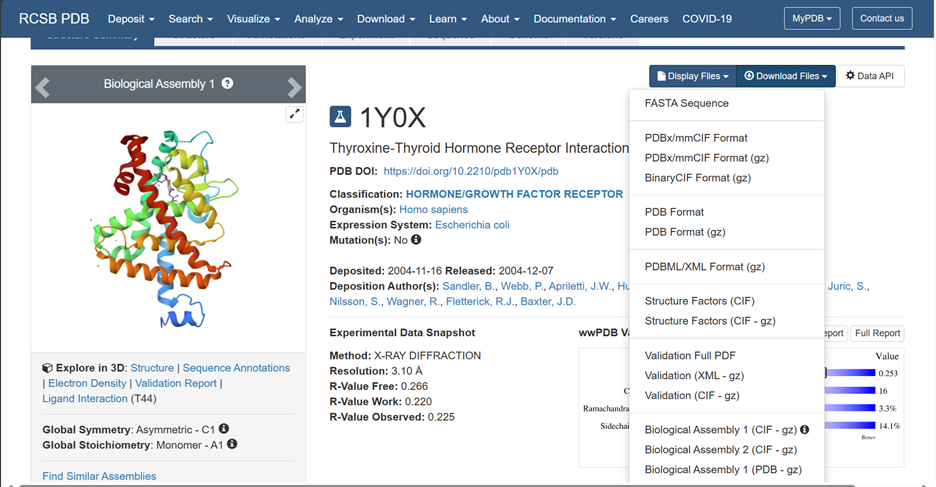
You can download your PDB file from the Protein Databank by going to the website:
https://www.rcsb.org/structure/1Y0X
and input your 4 digit code for the protein, 1Y0X in our case and click on PDB format from the drop down menu.
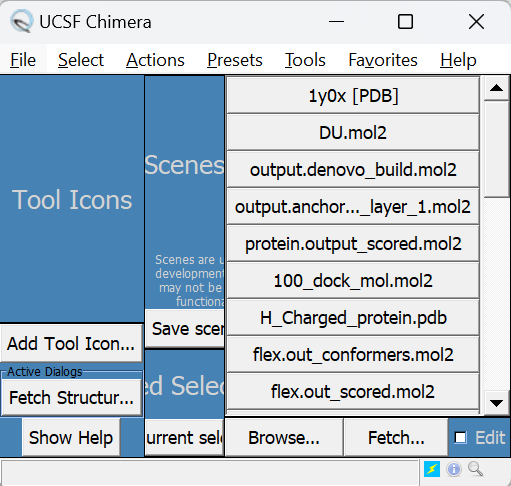
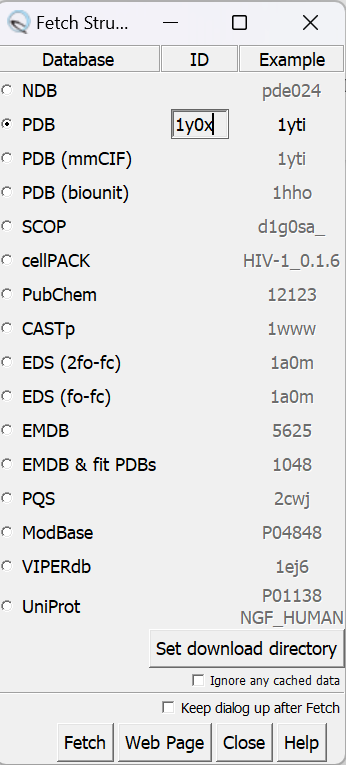
Alternatively, you can also get the file from the fetch function in Chimera:
- Open Chimera
- Click on Fetch
- Input the PDB ID to the box next to PDB line and hit Fetch
Preparation of the ligand and protein
Before running any DOCK function, you need to have all the required materials (protein, ligands, parameters files, library, ...). Here, you can see how to prepare your protein and ligand for the docking later on.
- Evaluate the structure to determine if there are any missing loops
- Prepare the protein structure
- Prepare the ligand structure
Evaluating the Structure
Load up your protein structure
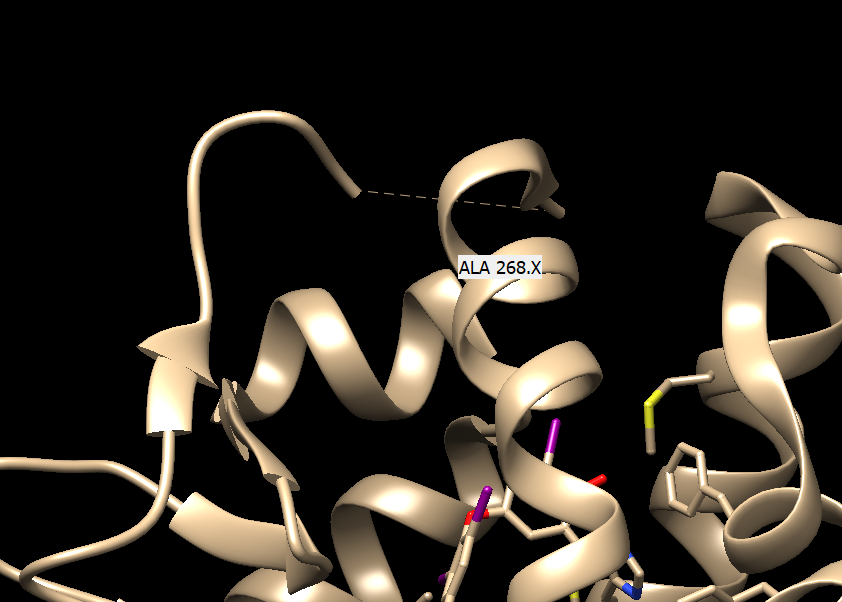
Manually look for the broken dash line that indicates missing regions in the protein
Determine how far the missing regions is from the binding site:
- Select an atom at near the start of the missing section (hold the ctrl button while clicking it)
- Select another atom near the binding site (hold ctrl + shift while clicking the second atom)
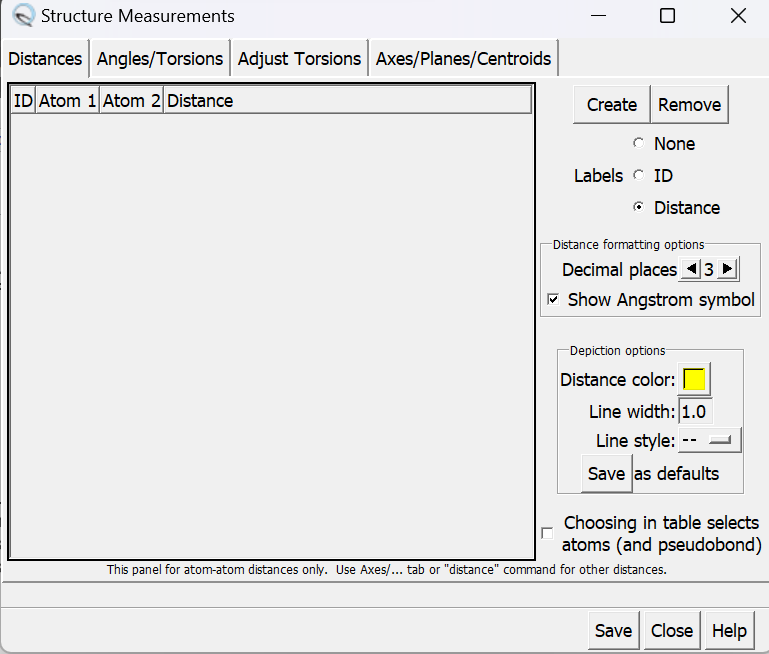
- Go to Tools → Structure Analysis → Distances
A popup window will show up and you can click on create
The result comes out to be around 15 Angstrom, which may interfere with our pocket so we should model in the loop.
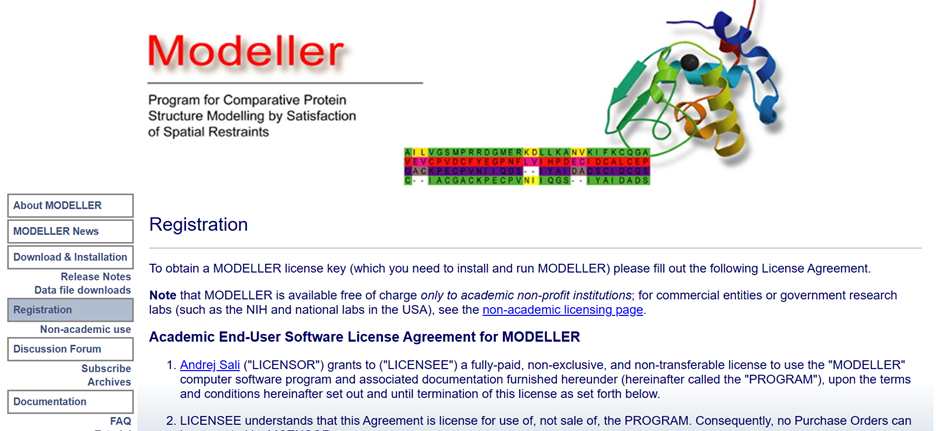
To do that, we need to use the package Modeller from:
https://www.salilab.org/modeller/registration.html
Register and receive the code in email and have it handy for the next part
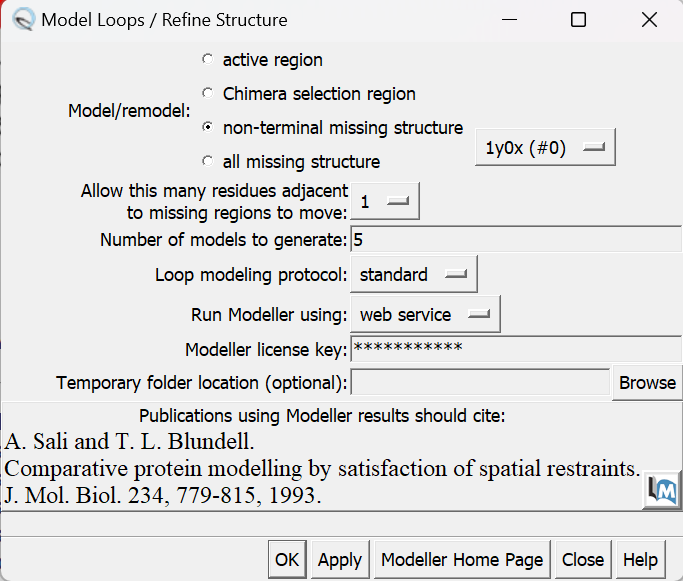
In Chimera:
- Tools
- Structure Editting
- Model/Refine Loops
In the pop-up window, insert your license key and hit apply.
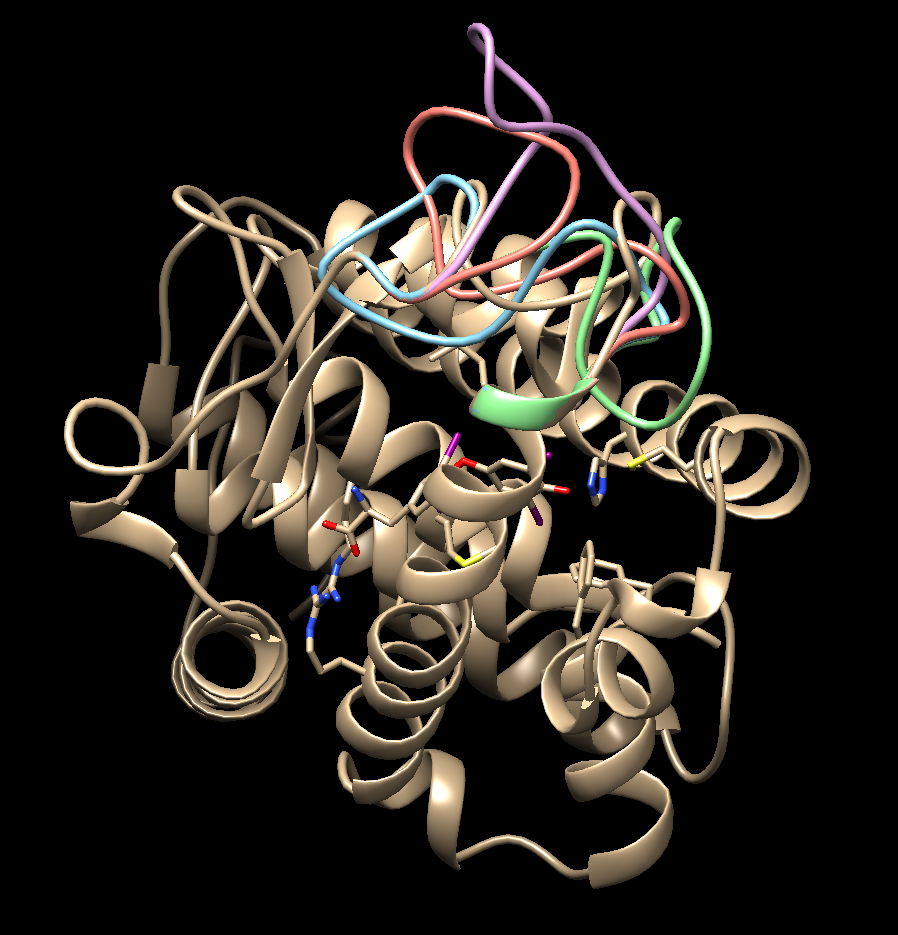
Choose the structure with the lowest zDOPE score and save that model as your working protein file.
Preparing the Protein file
- Select an atom on the protein by Ctrl + click
- Press the up arrow until the entire protein is selected
- Go to Select → Invert (all models). This will change the selection from the protein to everything else in the structure
- Go to Actions → Atoms/Bonds → Delete
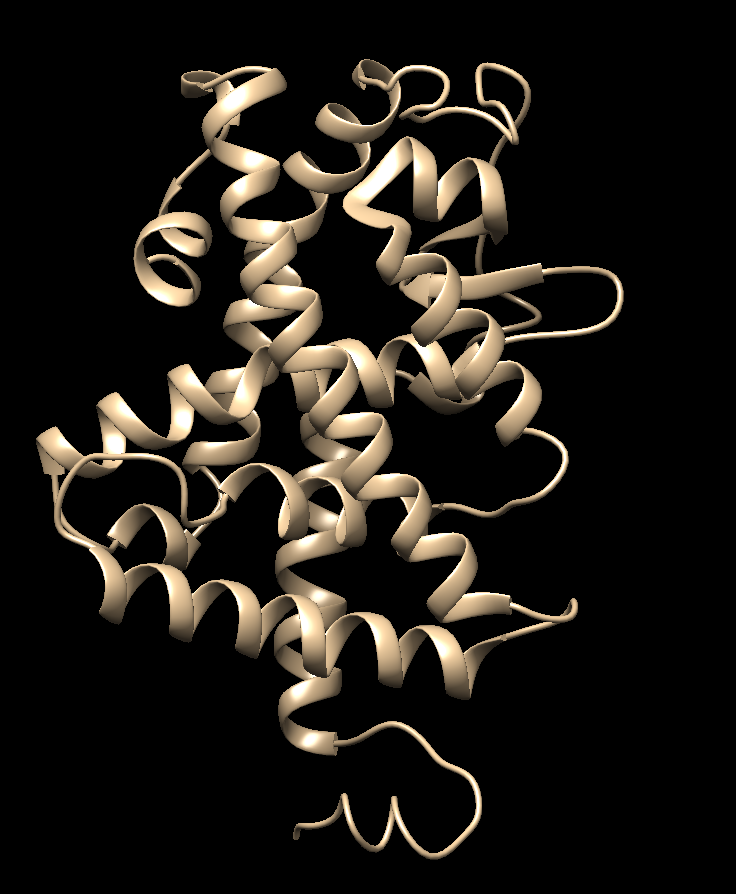
- Save the structure with a new name 1y0x_protein.pdb
- Also save the structure in mol2 format 1y0x_protein.mol2
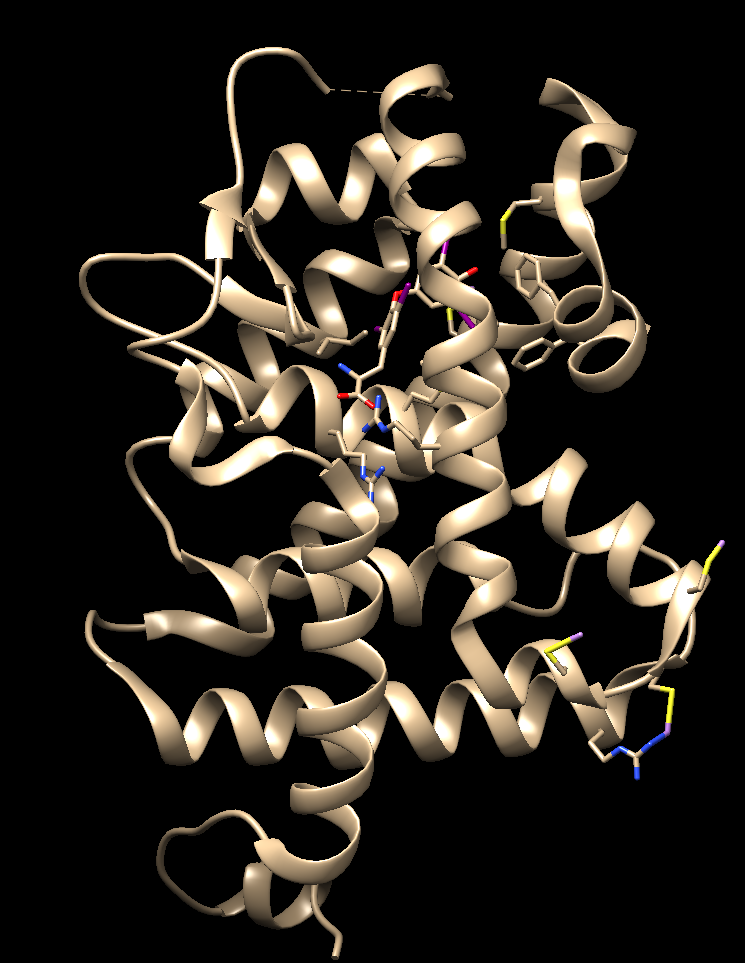
Your pdb file will now look similar to this:
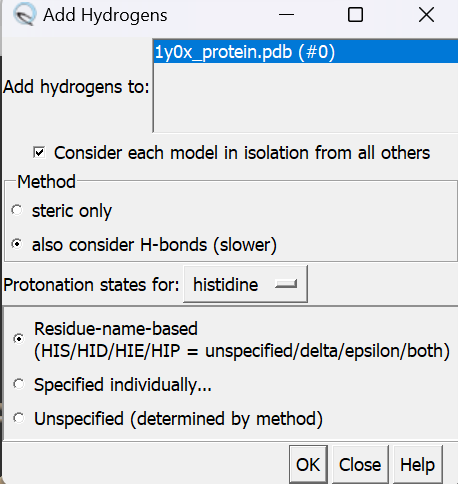
Next, we need to add hydrogens to the structure. In Chimera, go to:
- Tools
- Structure Editting
- AddH
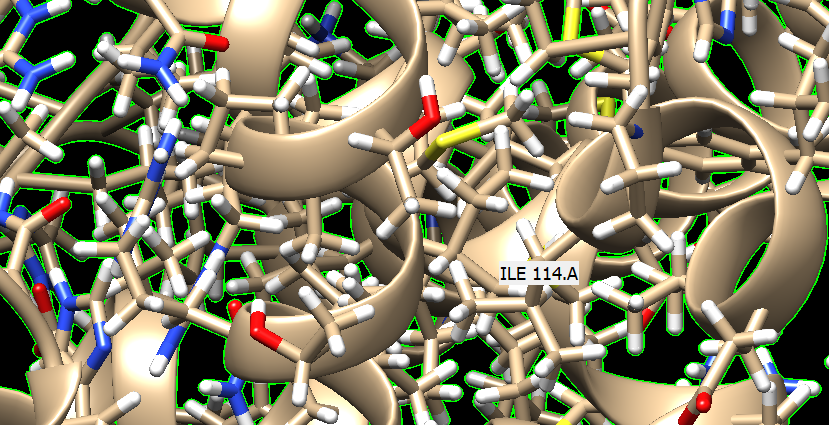
In the pop-up window, click OK and wait until bottom left says Hydrogen added. Double check if hydrogen is added by selecting the whole protein and go to Actions → Atoms/Bonds → show
If you see the white lines, it means the hydrogens were successfully added.
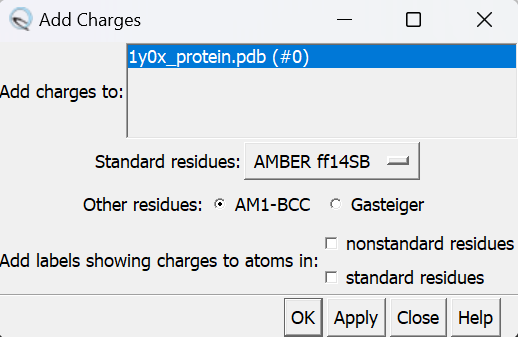
Next, we need to add charge to the structure. In Chimera, go to:
- Tools
- Structure Editting
- Add Charge
Click on OK and once the program is finished the bottom left hand corner will tell you what the total charge of the structure is. This number should be an integer. Your protein structure is now completely prepped and ready for docking. Save the protein into 2 files:
   protein_final.pdb
   protein_final.mol2
Preparing the Ligand File
Follow the same procedure as for preparing the protein with the ligand:
- Start with saving a file with just the ligand
- Add hydrogen to the ligand file
- Add charged to the ligand file
- Save the ligand file in 2 formats .pdb and .mol2.
   ligand_final.pdb
   ligand_final.mol2
The ligand file should look like this when you are done:
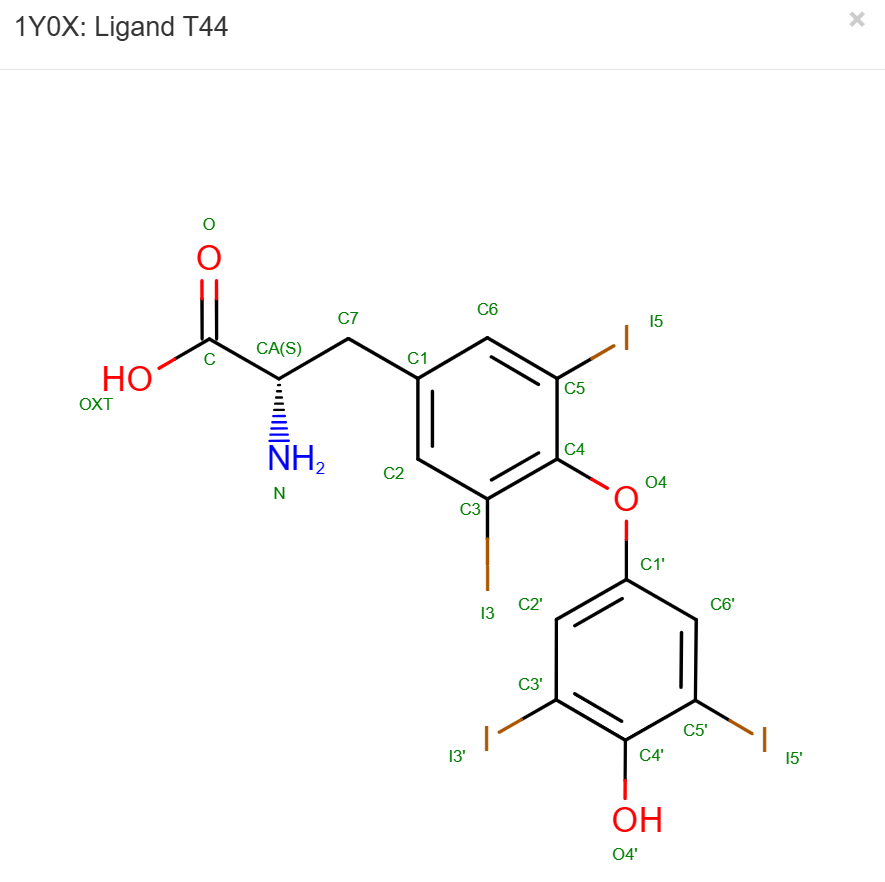
Double checking the hydrogen position by going to PDB and look at their 2D structure under Small Molecules:
Final step
Finally, move your 4 prepped protein and ligand files into subdirectory 001.structure
Creating the Protein Binding Site Surface
DOCK algorithm works on works by indetifying spheres around the protein surface, so we need to generate these surface and spheres parameter files for the docking process.
Creating the Required Surface (DMS) File
In Chimera, open the protein_final.pdb file,
- Actions
- Surface
- Show
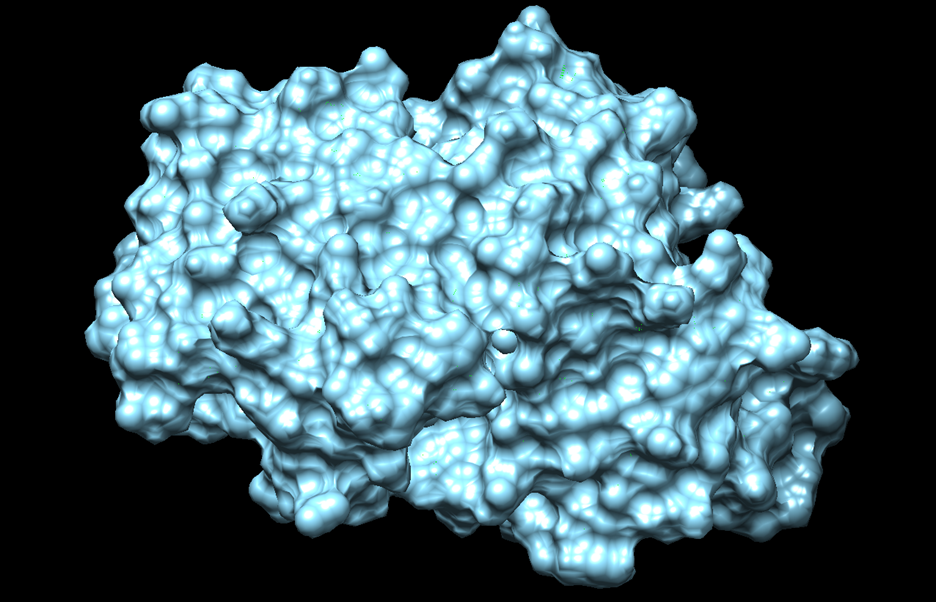
Your protein should look like this with the van der waals surface displayed.
Now you can generate the dms file by:
- Tools
- Structure Editting
- Write DMS
You should get a file like following
protein_surface.dms
Double check by opening a fresh session of Chimera and open both the protein_final.pdb file as well as the protein_surface.dms file and make sure that the surface is generated around the protein structure.
Generating Spheres for the Binding Site
Now that we have a .dms file, we need to turn it into something that DOCK recognize (spheres) using a program called sphgen. This program is run on the command line on Seawulf. First the .dms file need to be in the 002.surface_spheres directory. Now you can make a script to generate the spheres:
vi INSPH
In the Vi interface, insert the scripts as follows:
   protein_surface.dms
   R
   X
   0.0
   4.0
   1.4
   protein_spheres.sph
Now you can run that script using the command below:
sphgen -i INSPH -o OUTSPH
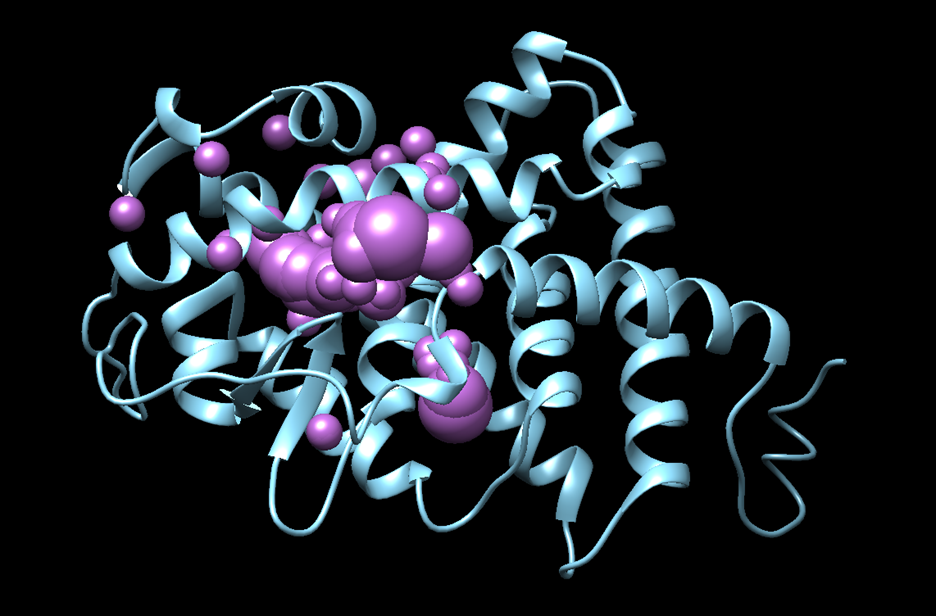
Double check if the spheres are generated properly by opening the output file protein_spheres.sph that appears in our directory in Chimera, it should look similar to this:
Binding Site Spheres
You can select the spheres around the binding sites only for DOCK to work with using the command below in Seawful:
sphere_selector protein_sphere.sph ../001.structure/ligand_final.mol2 15.0
The script above will select spheres that are within 15 Angstrom to the ligands so that docking can be carried out within these boundaries. When this program has successfully completed you'll see a new file in your directory called selected_spheres.sph. This file generated spheres which should line up with the binding site of the protein. We need to verify this in Chimera.
- scp selected_spheres.sph to your local computer
- In Chimera open selected_spheres.sph
- In the current session, open the protein_final.pdb
- You should see the spheres located within the binding site of the protein, similar to:
We should also verify that the spheres are actually where the ligand is. Let's do this by selecting the spheres, hiding them from view, and verifying the ligand is in the same location:
- Hold down ctrl and click on a sphere
- Press the up arrow until all spheres are selected
- Actions → Atoms/Bonds → hide
- Verify the ligand is where the spheres were
and we see the ligand is where the spheres were so we can be confident in our work so far.
Box and Grid Generation
The next step in the docking process is to generate energy interactions between the atoms of the protein and ligand. If this was done for the whole complex it would take too long to run to be useful. To get around this computationally expensive step, dock uses a box/grid method. We will define a box around the area of interest for the protein/ligand and DOCK will generate a grid within this box which will be used in the energy calculations.
Generating the Box
To generate the box we will be working again on the command line using a DOCK program called showbox. Start by logging into Seawulf and navigating to your 003.gridbox directory. We need to make a new file called showbox.in by typing:
vi showbox.in
This will create a new file, with a filename of showbox.in and open it in vi. The following commands need to be typed:
     Y
     8.0
     ../002.surface_spheres/selected_spheres.sph
     1
     1y0x.box.pdb
Remember to change the last line to be a filename with the number of protein you are working with. The second line of this code (8.0) is telling dock how many angstroms from the selected spheres to draw the box. Depending on your system you may need to modify this number.
To run this file, simply type:
showbox < showbox.in
If showbox was successful the file 1y0x.box.pdb will now be in your directory.
Generating the Grid
Now that we have our box defined we need to instruct DOCK to generate the grid within it. We do this using a DOCK program called grid:
vi grid.in
This command will generate and open a file named grid.in. The commands to be typed into this file are:
  allow_non_integral_charges                no
  compute_grids                             yes
  grid_spacing                              0.4
  output_molecule                           no
  contact_score                             no
  energy_score                              yes
  energy_cutoff_distance                    9999
  atom_model                                a
  attractive_exponent                       6
  repulsive_exponent                        9
  distance_dielectric                       yes
  dielectric_factor                         4.
  bump_filter                               yes
  bump_overlap                              0.75
  receptor_file                              ../001.structure/protein_final.mol2
  box_file                                  1y0x.box.pdb
  vdw_definition_file                       /gpfs/projects/AMS536/zzz.programs/dock6.10/parameters/vdw_AMBER_parm99.defn
  score_grid_prefix                         grid
The only change you need to make to the above commands is the receptor_file and box_file to reflect the files you previously generated.
Once this file is saved, run it:
grid -i grid.in -o 1y0xGridInfo.out
Be patient, this step might take a few minutes to run. You will know it's worked successfully if you see:
- grid.bmp
- grid.nrg
- 1y0xGridInfo.out
in your directory. With the box and grid successfully generated we are ready to move onto the energy minimization step.
Energy Minimization
At its core, DOCK is finding interactions between a protein and ligand by looking at energy interactions between atoms. In order for DOCK to give the most accurate results we need to ensure that the ligand is at its lowest energy state before docking it into the binding site of the protein.
Ligand Minimization
For this section we will be working in the 004.energy_min directory and will be using the dock6 command. Again we need to generate the input file that dock6 needs:
vim min.in
Once in vim the following lines need to be typed in:
 conformer_search_type                                        rigid
 use_internal_energy                                          yes
 internal_energy_rep_exp                                      12
 internal_energy_cutoff                                       100.0
 ligand_atom_file                                             ../001.structure/ligand_final.mol2
 limit_max_ligands                                            no
 skip_molecule                                                no
 read_mol_solvation                                           no
 calculate_rmsd                                               yes
 use_rmsd_reference_mol                                       yes
 rmsd_reference_filename                                      ../001.structure/protein_final.mol2
 use_database_filter                                          no
 orient_ligand                                                no
 bump_filter                                                  no
 score_molecules                                              yes
 contact_score_primary                                        no
 grid_score_primary                                           yes
 grid_score_rep_rad_scale                                     1
 grid_score_vdw_scale                                         1
 grid_score_es_scale                                          1
 grid_score_grid_prefix                                       ../003.gridbox/grid
 minimize_ligand                                              yes
 simplex_max_iterations                                       1000
 simplex_tors_premin_iterations                               0
 simplex_max_cycles                                           1
 simplex_score_converge                                       0.1
 simplex_cycle_converge                                       1.0
 simplex_trans_step                                           1.0
 simplex_rot_step                                             0.1
 simplex_tors_step                                            10.0
 simplex_random_seed                                          0
 simplex_restraint_min                                        yes
 simplex_coefficient_restraint                                10.0
 atom_model                                                   all
 vdw_defn_file                                                /gpfs/projects/AMS536/zzz.programs/dock6.10/parameters/vdw_AMBER_parm99.defn
 flex_defn_file                                               /gpfs/projects/AMS536/zzz.programs/dock6.10/parameters/flex.defn
 flex_drive_file                                              /gpfs/projects/AMS536/zzz.programs/dock6.10/parameters/flex_drive.tbl
 ligand_outfile_prefix                                        1y0x.lig.min
 write_orientations                                           no
 num_scored_conformers                                        1
 rank_ligands                                                 no
And the file is run with the following command:
dock6 -i min.in -o min.out
After successful completion of the program two new files will be in your directory:
- min.out
- 1y0x.lig.min.mol2
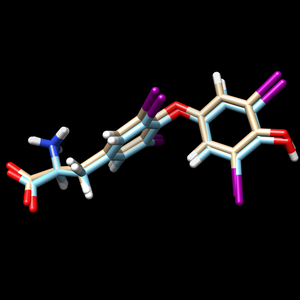
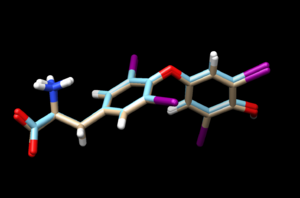
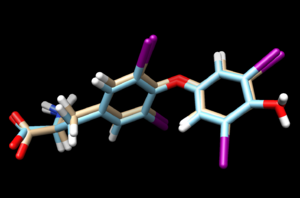
scp the .mol2 file back to your local computer. To view the changes that dock made to the structure, and open the 1y0x.lig.min.mol2 file in Chimera and in the same session, open the ligand_final.pdb file. Remember the ligand_final.pdb is the file we saved after making the protonation changes to the ligand. You should see something similar to:
The 1y0x.ligand from PDB with hydrogen and charges is cyan and the newly generated and energy minimized 1y0x.lig.min.mol2 is tint
Footprint Analysis
At its core, DOCK can be thought of as a program which evaluates, minimizes, and uses the electrostatic and VDW interactions between the ligand and protein to determine how they bind to each other. A footprint analysis is a way to visualize these interactions and possibly be used to design new ligands with the same, or better, set of energetics. The steps in this section will be done on Seawulf in the 005.footprint directory. We will be using the dock6 command and again need to create an input file:
vi footprint.in
The following lines needed to be typed into the newly created file:
 conformer_search_type                                        rigid
 use_internal_energy                                          no
 ligand_atom_file                                             ../004.energy_min/1y0x.lig.min_scored.mol2
 limit_max_ligands                                            no
 skip_molecule                                                no
 read_mol_solvation                                           no
 calculate_rmsd                                               no
 use_database_filter                                          no
 orient_ligand                                                no
 bump_filter                                                  no
 score_molecules                                              yes
 contact_score_primary                                        no
 grid_score_primary                                           no
 multigrid_score_primary                                      no
 dock3.5_score_primary                                        no
 continuous_score_primary                                     no
 footprint_similarity_score_primary                           yes
 fps_score_use_footprint_reference_mol2                       yes
 fps_score_footprint_reference_mol2_filename                  ../001.structure/ligand_final.mol2
 fps_score_foot_compare_type                                  Euclidean
 fps_score_normalize_foot                                     no
 fps_score_foot_comp_all_residue                              yes
 fps_score_receptor_filename                                  ../001.structure/protein_final.mol2
 fps_score_vdw_att_exp                                        6
 fps_score_vdw_rep_exp                                        9
 fps_score_vdw_rep_rad_scale                                  1
 fps_score_use_distance_dependent_dielectric                  yes
 fps_score_dielectric                                         4.0
 fps_score_vdw_fp_scale                                       1
 fps_score_es_fp_scale                                        1
 fps_score_hb_fp_scale                                        0
 minimize_ligand                                              no
 atom_model                                                   all
 vdw_defn_file                                                /gpfs/projects/AMS536/zzz.programs/dock6.10/parameters/vdw_AMBER_parm99.defn
 flex_defn_file                                               /gpfs/projects/AMS536/zzz.programs/dock6.10/parameters/flex.defn
 flex_drive_file                                              /gpfs/projects/AMS536/zzz.programs/dock6.10/parameters/flex_drive.tbl
 ligand_outfile_prefix                                        1y0x_footprint.out
 write_footprints                                             yes
 write_hbonds                                                 yes
 write_orientations                                           no
 num_scored_conformers                                        1
 rank_ligands                                                 no
to generate the footprint of the ligand/protein interaction type:
dock6 -i footprint.in
Again, you will know the program successfully ran if the following three files are now in your directory:
- 1y0x_footprint.out_footprint_scored.txt
- 1y0x_footprint.out_hbond_scored.txt
- 1y0x_footprint.out_scored.mol2
In order to view/analyze these results we need to use a python script that is located in the class directory. Copy it over to your 005.footprint directory with the following command:
cp /gpfs/projects/AMS536/zzz.programs/plot_footprint_single_magnitude.py .
To run this script, first we load the python using:
module load py/2.7.15
Then, type:
python plot_footprint_single_magnitude.py 1y0x_footprint.out_footprint_scored.txt 50
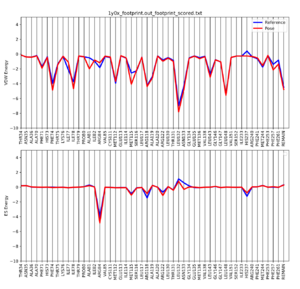
Once the script is completed you will see a .pdf file in your directory. scp this file back to your local computer. The file contains two plots that shows the energetic signature for the 50 most significant residues and will look similar to:
DOCK
We will be exploring three different options of the DOCK program:
- Rigid Docking
- Fixed Anchor Docking
- Flexible Docking
Each option has it's own pros and cons and your individual system should dictate which option you choose. Note: In the input file for each of these options has a line:
num_scored_conformers 1
Changing this number will change the number of conformations saved from the docking session. And for each options, to generate input file, the recommended way is to create a file first by typing:
touch example.in
then to make the file executable, type:
chmod+x example.in
then fill the input file using:
dock6 -i example.in
This will ask a few questions regarding the type of docking and other parameters and populate the input file accordingly. The input files for three different docking can be generated by answering those questions. In the next sections, the put files are pasted which was created from answering those questions.
Rigid Docking
When using rigid docking, the DOCK program does not sample different conformations of the ligand to try and find the most energetically stable. It simply treats the ligand as a rigid structure and tries to fit it into the binding site of the protein. For this step we will be using the energy minimized ligand file we generated above. This section will again be completed on Seawulf, please move to the 006.rigid_docking directory.
Again we need an input file that can be created using the command:
vi rigid.in
The following lines need to be typed into the file:
 conformer_search_type                                        rigid
 use_internal_energy                                          yes
 internal_energy_rep_exp                                      12
 internal_energy_cutoff                                       100.0
 ligand_atom_file                                             ../004.energy_min/1y0x.lig.min_scored.mol2
 limit_max_ligands                                            no
 skip_molecule                                                no
 read_mol_solvation                                           no
 calculate_rmsd                                               yes
 use_rmsd_reference_mol                                       yes
 rmsd_reference_filename                                      ../004.energy_min/1y0x.lig.min_scored.mol2
 use_database_filter                                          no
 orient_ligand                                                yes
 automated_matching                                           yes
 receptor_site_file                                           ../002.surface_spheres/selected_spheres.sph
 max_orientations                                             1000
 critical_points                                              no
 chemical_matching                                            no
 use_ligand_spheres                                           no
 bump_filter                                                  no
 score_molecules                                              yes
 contact_score_primary                                        no
 grid_score_primary                                           yes
 grid_score_rep_rad_scale                                     1
 grid_score_vdw_scale                                         1
 grid_score_es_scale                                          1
 grid_score_grid_prefix                                       ../003.gridbox/grid
 minimize_ligand                                              yes
 simplex_max_iterations                                       1000
 simplex_tors_premin_iterations                               0
 simplex_max_cycles                                           1
 simplex_score_converge                                       0.1
 simplex_cycle_converge                                       1.0
 simplex_trans_step                                           1.0
 simplex_rot_step                                             0.1
 simplex_tors_step                                            10.0
 simplex_random_seed                                          0
 simplex_restraint_min                                        no
 atom_model                                                   all
 vdw_defn_file                                                /gpfs/projects/AMS536/zzz.programs/dock6.10/parameters/vdw_AMBER_parm99.defn
 flex_defn_file                                               /gpfs/projects/AMS536/zzz.programs/dock6.10/parameters/flex.defn
 flex_drive_file                                              /gpfs/projects/AMS536/zzz.programs/dock6.10/parameters/flex_drive.tbl
 ligand_outfile_prefix                                        rigid.out
 write_orientations                                           no
 num_scored_conformers                                        10
 write_conformations                                          yes
 cluster_conformations                                        yes
 cluster_rmsd_threshold                                       2.0
 rank_ligands                                                 no
Remember to again change the necessary lines to point to your specific files. Once this is completed run the program by typing:
dock6 -i rigid.in -o rigid.out
Again, be patient as this may take a few minutes to complete. Once it's done running you will see two new files in your directory:
- rigid.out_scored.mol2
- rigid.out
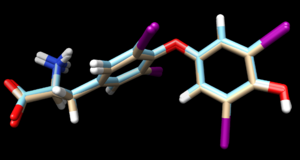
scp the .mol2 file over to your local computer. Start a new session in Chimera and open the energy minimized ligand file from the previous step and the rigid docked ligand you just created (1y0x.lig.min_scored.mol2 and rigid.out_scored.mol2) to view the differences between the energy minimized ligand and DOCK's attempt to rigid dock that structure into the protein.
The 1y0x.lig.min_scored.mol2 is tint and the newly generated fixed.out_scored.mol2 is cyan.
Looking at this file we see that the two are very similar to each other.
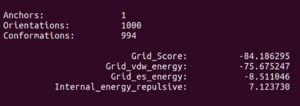
Now we can look at the other file that dock generated, rigid.out. If we scroll to the bottom you will see grid scoring for this run:
Fixed Anchor Docking
The next DOCK option we will be looking at is called 'Fixed Anchor Docking'. For this option, DOCK cuts the ligand into fragments along its rotatable bonds. It then chooses the largest fragment as the 'anchor' and orients this fragment into the binding site of the protein. Once this is completed, the next fragments are added to the ligand, orientating them such that their energy is minimized but keeping them as rigid bodies. Comparing this to Rigid Docking, we see that more conformational sampling is being done but still within limits since each fragment is considered rigid.
We'll be working on the command line again, please move to the 007.fixed_anchor_docking directory and create an input file called fixed.in:
vim fixed.in
and type the following lines:
 conformer_search_type                                        flex
 write_fragment_libraries                                     no
 user_specified_anchor                                        no
 limit_max_anchors                                            no
 min_anchor_size                                              5
 pruning_use_clustering                                       yes
 pruning_max_orients                                          1000
 pruning_clustering_cutoff                                    100
 pruning_conformer_score_cutoff                               100.0
 pruning_conformer_score_scaling_factor                       1.0
 use_clash_overlap                                            no
 write_growth_tree                                            no
 use_internal_energy                                          yes
 internal_energy_rep_exp                                      12
 internal_energy_cutoff                                       100.0
 ligand_atom_file                                             ../004.energy_min/1y0x.lig.min_scored.mol2
 limit_max_ligands                                            no
 skip_molecule                                                no
 read_mol_solvation                                           no
 calculate_rmsd                                               yes
 use_rmsd_reference_mol                                       yes
 rmsd_reference_filename                                      ../004.energy_min/1y0x.lig.min_scored.mol2
 use_database_filter                                          no
 orient_ligand                                                no
 bump_filter                                                  no
 score_molecules                                              yes
 contact_score_primary                                        no
 grid_score_primary                                           yes
 grid_score_rep_rad_scale                                     1
 grid_score_vdw_scale                                         1
 grid_score_es_scale                                          1
 grid_score_grid_prefix                                       ../003.gridbox/grid
 minimize_ligand                                              yes
 minimize_anchor                                              yes
 minimize_flexible_growth                                     yes
 use_advanced_simplex_parameters                              no
 minimize_flexible_growth_ramp                                no
 simplex_max_cycles                                           1
 simplex_score_converge                                       0.1
 simplex_cycle_converge                                       1
 simplex_trans_step                                           1
 simplex_rot_step                                             0.1
 simplex_tors_step                                            10.0
 simplex_anchor_max_iterations                                500
 simplex_grow_max_iterations                                  500
 simplex_grow_tors_premin_iterations                          0
 simplex_random_seed                                          0
 simplex_restraint_min                                        no
 atom_model                                                   all
 vdw_defn_file                                                /gpfs/projects/AMS536/zzz.programs/dock6.10/parameters/  vdw_AMBER_parm99.defn
 flex_defn_file                                               /gpfs/projects/AMS536/zzz.programs/dock6.10/parameters/flex.defn
 flex_drive_file                                              /gpfs/projects/AMS536/zzz.programs/dock6.10/parameters/flex_drive.tbl
 ligand_outfile_prefix                                        1y0x_fixed_output
 write_orientations                                           no
 num_scored_conformers                                        1
 rank_ligands                                                 no
Again, change the necessary lines to point to your specific files. To run this file type:
dock6 -i fixed.in -o fixed.out
Once it's done running you will see two new files in your directory:
- fixed.out
- 1y0x_fixed_output_scored.mol2
scp the .mol2 file over to your local computer. Start a new session in Chimera and open the energy minimized ligand file from the previous step and the fixed anchor docked ligand you just created (1y0x.lig.min_scored.mol2 and 1y0x_fixed_output_scored.mol2) to view the differences between the energy minimized ligand and DOCK's attempt to place that structure using its fixed anchor algorithm. Your image should be similar to:
The 1y0x.lig.min_scored.mol2 is cyan and the newly generated 1y0x_fixed_output_scored.mol2 is tint.
Now we can look at the other file that dock generated, fixed.out. If we scroll to the bottom you will see grid scoring for this run:
Anchors:               2
Orientations:          2
Conformations:         111
                         Grid_Score:          -79.230011
                    Grid_vdw_energy:          -73.074615
                     Grid_es_energy:           -6.155398
          Internal_energy_repulsive:            6.240775
Flexible Docking
The final docking method we're going to look at is called flexible docking. This is the most computationally expensive of the three methods, because now DOCK will sample all conformations of all rotatable bonds within the ligand attempting to minimize the energetics of the ligand. Once again we will be working on the command line in Seawulf, but now in your 008.flex_docking directory.
Create your input file:
vim flex.in
And type the following lines into your input file:
 conformer_search_type                                        flex
 write_fragment_libraries                                     no
 user_specified_anchor                                        no
 limit_max_anchors                                            no
 min_anchor_size                                              5
 pruning_use_clustering                                       yes
 pruning_max_orients                                          1000
 pruning_clustering_cutoff                                    100
 pruning_conformer_score_cutoff                               100.0
 pruning_conformer_score_scaling_factor                       1.0
 use_clash_overlap                                            no
 write_growth_tree                                            no
 use_internal_energy                                          yes
 internal_energy_rep_exp                                      12
 internal_energy_cutoff                                       100.0
 ligand_atom_file                                             ../004.energy_min/1y0x.lig.min_scored.mol2
 limit_max_ligands                                            no
 skip_molecule                                                no
 read_mol_solvation                                           no
 calculate_rmsd                                               yes
 use_rmsd_reference_mol                                       yes
 rmsd_reference_filename                                      ../004.energy_min/1y0x.lig.min_scored.mol2
 use_database_filter                                          no
 orient_ligand                                                yes
 automated_matching                                           yes
 receptor_site_file                                           ../002.surface_spheres/selected_spheres.sph
 max_orientations                                             1000
 critical_points                                              no
 chemical_matching                                            no
 use_ligand_spheres                                           no
 bump_filter                                                  no
 score_molecules                                              yes
 contact_score_primary                                        no
 grid_score_primary                                           yes
 grid_score_rep_rad_scale                                     1
 grid_score_vdw_scale                                         1
 grid_score_es_scale                                          1
 grid_score_grid_prefix                                       ../003.gridbox/grid
 minimize_ligand                                              yes
 minimize_anchor                                              yes
 minimize_flexible_growth                                     yes
 use_advanced_simplex_parameters                              no
 minimize_flexible_growth_ramp                                yes
 simplex_max_cycles                                           1
 simplex_score_converge                                       0.1
 simplex_initial_score_coverge                                5
 simplex_cycle_converge                                       1.0
 simplex_trans_step                                           1.0
 simplex_rot_step                                             0.1
 simplex_tors_step                                            10.0
 simplex_anchor_max_iterations                                500
 simplex_grow_max_iterations                                  250
 simplex_grow_tors_premin_iterations                          0
 simplex_random_seed                                          0
 simplex_restraint_min                                        no
 atom_model                                                   all
 vdw_defn_file                                                /gpfs/projects/AMS536/zzz.programs/dock6.10/parameters/vdw_AMBER_parm99.defn
 flex_defn_file                                               /gpfs/projects/AMS536/zzz.programs/dock6.10/parameters/flex.defn
 flex_drive_file                                              /gpfs/projects/AMS536/zzz.programs/dock6.10/parameters/flex_drive.tbl
 ligand_outfile_prefix                                        flex.out
 write_orientations                                           no
 num_scored_conformers                                        10
 write_conformations                                          yes
 cluster_conformations                                        yes
 cluster_rmsd_threshold                                       2.0
 rank_ligands                                                 no
and run the file using the command:
dock6 -i flex.in -o flex.out
When the program has finished running you will see two new files in your directory:
- flex.out
- flex.out_scored.mol2
again, scp the .mol2 file to your local computer and open it into a new session in Chimera. Overlaying this file with the energy minimized ligand we see:
Looking at the grid scores from flex.out:
                         Grid_Score:          -82.719231
                    Grid_vdw_energy:          -76.588737
                     Grid_es_energy:           -6.130490
          Internal_energy_repulsive:            7.541358
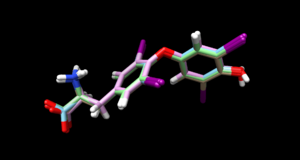
Its interesting to now load the results from all three docking methods, along with the energy minimized ligand, and see the differences:
In this image:
- tan is energy minimized ligand
- cyan is the rigid docking
- pink is the fixed anchor docking
- green is the flexible docking
Virtual Screening of a Ligand Library
Up to this point we have been docking one molecule, the ligand that was in the protein/ligand complex from the pdb. But DOCK has the ability to find interactions between the protein and many different small molecules, finding the top binding ligands. This allows us to "screen" thousands of molecules but only spend time digging into the details of the top results. For this tutorial, we have created a file, VS_library_5K.mol2, which contains all the information needed on the molecules we wish to screen. Again we will be working on the command line in the 009.virtual_screening directory.
Let's create our input file:
vim virtual.in
which needs to have the following lines typed in:
conformer_search_type                                        flex
 write_fragment_libraries                                     no
 user_specified_anchor                                        no
 limit_max_anchors                                            no
 min_anchor_size                                              5
 pruning_use_clustering                                       yes
 pruning_max_orients                                          1000
 pruning_clustering_cutoff                                    100
 pruning_conformer_score_cutoff                               100.0
 pruning_conformer_score_scaling_factor                       1.0
 use_clash_overlap                                            no
 write_growth_tree                                            no
 use_internal_energy                                          yes
 internal_energy_rep_exp                                      9
 internal_energy_cutoff                                       100.0
 ligand_atom_file                                             /gpfs/projects/AMS536/zzz.programs/VS_libraries/VS_library_5K.mol2
 limit_max_ligands                                            no
 skip_molecule                                                no
 read_mol_solvation                                           no
 calculate_rmsd                                               no
 use_database_filter                                          no
 orient_ligand                                                yes
 automated_matching                                           yes
 receptor_site_file                                           ../002.surface_spheres/selected_spheres.sph
 max_orientations                                             1000
 critical_points                                              no
 chemical_matching                                            no
 use_ligand_spheres                                           no
 bump_filter                                                  no
 score_molecules                                              yes
 contact_score_primary                                        no
 grid_score_primary                                           yes
 grid_score_rep_rad_scale                                     1
 grid_score_vdw_scale                                         1
 grid_score_es_scale                                          1
 grid_score_grid_prefix                                       ../003.gridbox/grid
 minimize_ligand                                              yes
 minimize_anchor                                              yes
 minimize_flexible_growth                                     yes
 use_advanced_simplex_parameters                              no
 minimize_flexible_growth_ramp                                yes
 simplex_max_cycles                                           1
 simplex_score_converge                                       0.1
 simplex_cycle_converge                                       1.0
 simplex_trans_step                                           1.0
 simplex_rot_step                                             0.1
 simplex_tors_step                                            10.0
 simplex_anchor_max_iterations                                500
 simplex_grow_max_iterations                                  250
 simplex_grow_tors_premin_iterations                          0
 simplex_random_seed                                          0
 simplex_restraint_min                                        no
 atom_model                                                   all
 vdw_defn_file                                                /gpfs/projects/AMS536/zzz.programs/dock6.10/parameters/vdw_AMBER_parm99.defn
 flex_defn_file                                               /gpfs/projects/AMS536/zzz.programs/dock6.10/parameters/flex.defn
 flex_drive_file                                              /gpfs/projects/AMS536/zzz.programs/dock6.10/parameters/flex_drive.tbl
 ligand_outfile_prefix                                        virtual.out
 write_orientations                                           no
 num_scored_conformers                                        1
 rank_ligands                                                 no
Running DOCK on 5000 molecules CANNOT be done on the login node of Seawulf. You will crash the system and have your login information suspended. All computationally intensive jobs such as this need to be submitted to Seawulf using the scheduler, Slurm. To do this you need to create a slurm script, which is just a text file that tells Seawulf what you want to run.
Create your slurm script
vim 1y0x_virtual.slurm
The contents of the slurm script are:
 #!/bin/bash
 #SBATCH --job-name=1y0x_vs_tutorial
 #SBATCH --output=vs_output.txt
 #SBATCH --ntasks=24
 #SBATCH --nodes=6
 #SBATCH --time=48:00:00
 #SBATCH -p long-28core

 module load intel/mpi/64/2018/18.0.3

 mpirun -np 168 dock6.mpi -i virtual.in -o virtual.out
To get this script to run, on the command line, type:
 module load slurm
 sbatch 1y0x_virtual.slurm
This script is virtually screening 5,000 molecules and could take up to 48 hours to complete. After 48 hours, slurm will stop the job even if all 5,000 compounds haven't been docked yet. At any point while it's running, if you want to see how many molecules have been docked so far, simply type:
grep Molecule: virtual.out | wc -l
be sure to type the above command from your 009.virtual_screening directory.
After 48 hours, our script stopped running and 4549 molecules had been docked to our protein. In order to find the top "hits" of small molecules we need to minimize the outputs which is outlined in the next section. After you got the result, we can move on to next step of Cartesian minimization and re-scoring steps, and we can view the result at the end.
Cartesian Minimization of Virtually Screened Small Molecules
In order to minimize the 4549 molecules that were docked we need to create an input file. cd over to your 010.cartesian_minimization directory and create the input file:
vi min.in
and type in the following lines:
 conformer_search_type                                        rigid
 use_internal_energy                                          yes
 internal_energy_rep_exp                                      12
 internal_energy_cutoff                                       100
 ligand_atom_file                                             ../009.virtual_screening/virtual.out_scored.mol2
 limit_max_ligands                                            no
 skip_molecule                                                no
 read_mol_solvation                                           no
 calculate_rmsd                                               no
 use_database_filter                                          no
 orient_ligand                                                no
 bump_filter                                                  no
 score_molecules                                              yes
 contact_score_primary                                        no
 grid_score_primary                                           no
 multigrid_score_primary                                      no
 dock3.5_score_primary                                        no
 continuous_score_primary                                     yes
 cont_score_rec_filename                                      ../001.structure/protein_final.mol2
 cont_score_att_exp                                           6
 cont_score_rep_exp                                           12
 cont_score_rep_rad_scale                                     1
 cont_score_use_dist_dep_dielectric                           yes
 cont_score_dielectric                                        4.0
 cont_score_vdw_scale                                         1.0
 cont_score_es_scale                                          1.0
 minimize_ligand                                              yes
 simplex_max_iterations                                       1000
 simplex_tors_premin_iterations                               0
 simplex_max_cycles                                           1.0
 simplex_score_converge                                       0.1
 simplex_cycle_converge                                       1.0
 simplex_trans_step                                           1.0
 simplex_rot_step                                             0.1
 simplex_tors_step                                            10.0
 simplex_random_seed                                          0
 simplex_restraint_min                                        no
 atom_model                                                   all
 vdw_defn_file                                                /gpfs/projects/AMS536/zzz.programs/dock6.10/parameters/vdw_AMBER_parm99.defn
 flex_defn_file                                               /gpfs/projects/AMS536/zzz.programs/dock6.10/parameters/flex.defn
 flex_drive_file                                              /gpfs/projects/AMS536/zzz.programs/dock6.10/parameters/flex_drive.tbl
 ligand_outfile_prefix                                        1y0x.virtual_screen.min
 write_orientations                                           no
 num_scored_conformers                                        1
 rank_ligands                                                 no
Once again do NOT run this input file on the login node. You need to submit it as a job. For that first you need to create a job script:
vim 1y0x_minimization.slurm
and type:
 #!/bin/bash
 #SBATCH --job-name=1y0x_minimization_tutorial
 #SBATCH --output=min_output.txt
 #SBATCH --ntasks=24
 #SBATCH --nodes=6
 #SBATCH --time=48:00:00
 #SBATCH -p long-28core

 #module load intel/mpi/64/2018/18.0.3

 #mpirun -np 168 dock6.mpi -i virtual.in -o virtual.out
 dock6 -i min.in -o min.out
Then submit the job, by giving the command:
 module load slurm
 sbatch 1y0x_minimization.slurm
The next step to perform on the almost 5,000 molecules that were docked is to re-score them and rank them to find potential hits that can be investigated further. The next, and final section of this tutorial, will walk you through that step.
Rescoring and Ranking Virtually Screened Molecules
Once again we will be working on the command line in Seawulf and submitting our input file using a slurm script. cd to your 011.reScore directory and type:
vi rescore.in
The following lines need to be typed into rescore.in

