Difference between revisions of "2020 DOCK tutorial 1 with PDBID 3VJK"
Stonybrook (talk | contribs) (→Software packages) |
Stonybrook (talk | contribs) (→Introduction) |
||
| Line 4: | Line 4: | ||
Welcome to the Rizzo lab! | Welcome to the Rizzo lab! | ||
| − | This tutorial is provided by the students of | + | This tutorial is provided by the students of Stony Brook University to help the community better understand the DOCK toolset. |
== Software packages == | == Software packages == | ||
Revision as of 20:39, 14 February 2020
Contents
Introduction
Welcome to the Rizzo lab!
This tutorial is provided by the students of Stony Brook University to help the community better understand the DOCK toolset.
Software packages
To follow this tutorial you will need to have the following programs installed:
DOCK
Chimera
This tutorial used Dock 6.9 & Chimera 1.13.1
At several points this tutorial will reference these programs as commands in a shell environment. The students who did this ran their programs on a UNIX (CoreOS or Ubuntu) server, although this process should generalize to your specific setup. For help, please reference available documentation.
<<Where can outsiders find scripts like sphgen?>>
UCLA website? rizzo lab website? There seem to be several sources on google
Background
Object preparation
Preparing the Structure for Docking
Downloading and Opening PDB File
Download the PDB Format file from the associated rcsb page here.
Select: Download files -> PDB Format
This file provides information on the 3D orientation of the atoms within the protein and ligand as well as any co-factors (any other molecules present during the crystallization experiment, typically water and metal ions). The file can be opened up and manipulated in the program Chimera.
Open Chimera:
Select: File -> Open -> (Location where you downloaded PDB file)
The protein should appear the same as the image above. The image can be rotated to view from different angles. This is called a Ribbon diagram and shows the backbone of the protein, however some amino acid side chains are shown by default. Also shown explicitly are NAG amino acid modifications, the Oxygen of several water molecules and M51 (the ligand that is complexed with the protein). There are no Hydrogen atoms represented anywhere. This is because PDB files do not contain information on Hydrogen atoms.
Preparation of the Protein Receptor for Docking
Docking requires that the protein receptor and ligand be separated into different files. First, the receptor file will be prepared. This particular protein is a homo-dimer (two identical units of the same peptide). For simplicity and to avoid possible complications in later steps, only one of the peptide chains will be retained. This step should be applied judiciously in protein systems where the ligand is at the interface of two dimers.
Select: Select -> Chain -> B
Select: Actions -> Atoms/ Bonds -> Delete
Only one monomer of protein should remain now.
(Picture)
Next the NAG amino acid modifications, waters and ligand will be removed. They are not crucial for the Docking experiment, and may be problematic and cause failure if retained.
Select: Select -> Residue -> All nonstandard
Select: Actions -> Atoms/ Bonds -> Delete
(Picture)
The receptor is now "clean" and should be saved prior to the next step.
Select: File -> Save Mol2 -> "3VJK_rec_woH.mol2"
It is important to give files a logical naming scheme. The woH portion is to specify Hydrogens have not yet been added. Move this file to the directory "001.structure"
Adding Hydrogens and Charge
In order to calculate interactions between the protein and ligand, Hydrogens must be added to the receptor. Chimera will apply standard protonation states to the amino acids. It is important to check these protonation states afterwards, as they may not match the crystallization experiment. For example, the paper associated with the PDB being worked with may specify a certain residue is protonated. It would then be crucial to check this after the following step, and if it is incorrect, to adjust it manually.
Select: Structure Editing -> Add H -> Ok
Next partial charges will be added to each atom in the receptor.
Select: Structure Editing -> Add Charge -> (AM1BCC charges should be selected) -> Ok
Now save this as a mol2 file "3VJK_rec_dockprep.mol2" and move it to the directory "001.structure"
Ligand
Sphere Selection
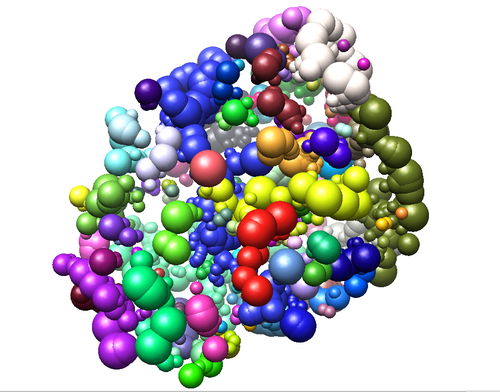
By this step, you should have the mol2 extractions of ligand and protein, in both hydrogenated and unhydrogenated forms (4 files). The next activity is to create an efficient representation of empty space inside the protein. This is done with the sphgen script, which tries to generate the largest possible sphere for any given empty space. In general, it is desirable for the spheres will eclipse with each other, but not with the protein itself.
The sphgen software takes in a series of inputs from prompts to the user, but we can automate this by piping these arguments through a file. We shall can this file INSPH. Generate your INSPH file with the following syntax:
   [your_receptor].dms
   <R flag> - enables sphere generation outside the protein surface (no eclipsing)
   <X flag  - uses all coordinates
   <double> - distance that steric interactions are checked (units?)
   <double> - Maximum sphere radius of generated sphere (units?)
   <double> - Size of sphere that rolls over dms file surface for cavities (units?)
   [your_receptor].sph
This is an example of how we wrote our file:
   3vjk_receptor_woH.dms
   R
   X
   0.0
   4.0
   1.4
   3vjk_receptor_woH.sph
Does it matter if the dms is generated with the hydrogens?
This should produce an sph file that you can then run through sphgen
sphgen -i INSPH -o OUTSPH

