Difference between revisions of "2024 DOCK tutorial 2 with PDBID 1NDV"
Stonybrook (talk | contribs) (→Ligand Energy Minimization) |
Stonybrook (talk | contribs) (→Ligand Energy Minimization) |
||
| Line 202: | Line 202: | ||
If the program ran successfully you will see a 1ndv.lig.min.mol2 file. | If the program ran successfully you will see a 1ndv.lig.min.mol2 file. | ||
| − | + | Save this file to your local computer and open it in Chimera with the original ligand file. You will see that DOCK has made very slight changes to the strucutre. | |
[[File:1ndv-min.png|thumb|center|upright=1.5]] | [[File:1ndv-min.png|thumb|center|upright=1.5]] | ||
Revision as of 17:51, 16 March 2024
Contents
Introduction
DOCK is a powerful computational tool used in drug design. "Docking" refers to the identification of low energy binding conformations of a small molecule, or ligand, in an active site. There are three methods in which DOCK performs docking: rigid, fixed anchor, and flexible. DOCK also has the ability to perform a virtual screen, which is analogous to a high throughput screen often performed in wet labs. This method allows for thousands of molecules to be docked and ranked so that the highest scoring molecules can move to the next stage of testing. A virtual screen can save both time and money when compared to a traditional high throughput screen. This tutorial will guide you through the process of performing each method of docking, a virtual screen, and associated analysis using PDB 1NDV on a HPC cluster (Seawulf). Replace 1NDV with your target protein in this tutorial.
Required Software and Skills
In order to complete this tutorial UCSF Chimera is required. Chimera is a powerful visualization tool that will aid in the preparation and analysis of the virtual screen. Please note that the newer version, Chimera X, can not be used for this tutorial as it lacks certain integrations with DOCK. While this tutorial will walk you through all steps necessary to use Chimera, it may be helpful to view this tutorial for a more in depth guide on the program.
It is also recommended that you have experience with Unix and vi. A Unix tutorial can be found on the site here and a vi tutorial can be found here.
Set-up
Before we begin, we need to set up our directories and download our file from the Protein Data Bank (PDB).
Creating Directories
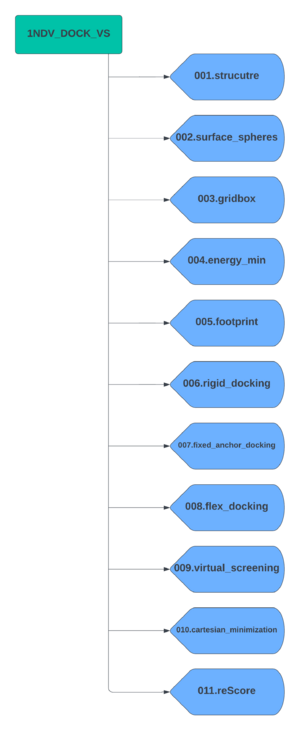
Create a parent directory which will contain all subdirectors for each docking step. For this tutorial we will name the parent directory 1NDV_DOCK_VS. Now create the subdirectories using the following scheme.
Downloading PDB File
Visit the RCSB Protein Data Bank (PDB) website and use the search bar to search for your target protein. As stated before, we will be using 1NDV for this tutorial.
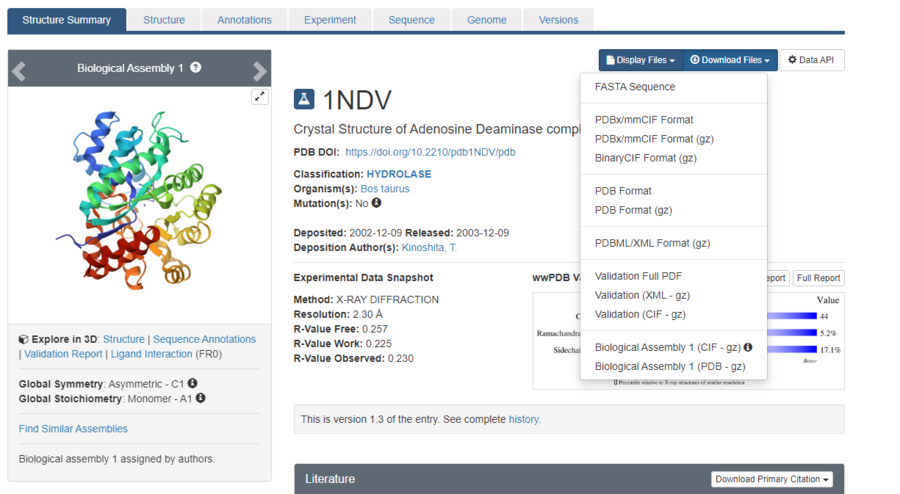
The page for the protein will look like this. Click the "Download Files" dropdown menu, and download the "PDB Format".
With the PDB file saved, we are now ready to begin generating files for DOCK!
Preparing Structure Files
Protein
Analyzing the Protein Structure:
Open your protein.pdb in Chimera.
Assess the protein structure:
1. Are there any missing loops?
2. Are there any metal coordination atoms forming key interactions with the protein?
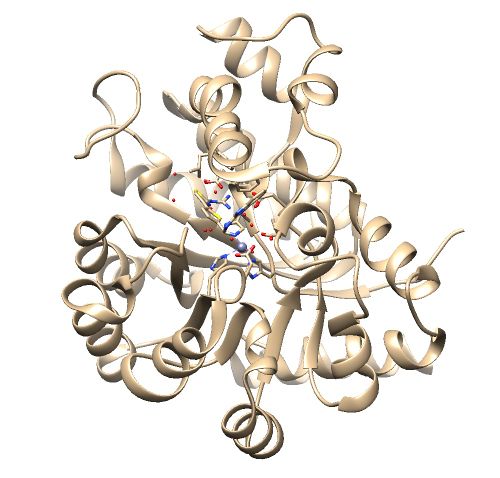
The .pdb for 1ndv from the RCSB Protein Data Bank is shown below.
Assessment:
1. No missing loops.
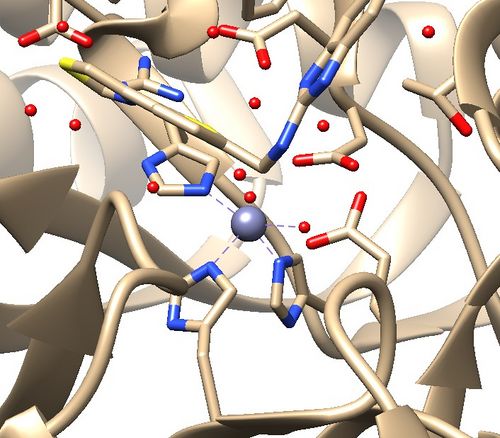
2. Zinc coordination with the protein and a water molecule. This zinc atom must be kept in the protein prep.
Ligand
We must first create a .pdb file with only the ligand. To do this we must select the ligand in Chimera. There are two ways to do this:
1.Select an atom on the ligand, and use the up arrow until the entire ligand is selected
-or-
2. Use the toolbar and click "Select" → "Structure" → "Ligand"
Once the ligand is selected use "Select" → "Invert" to select all other atoms present in the session.
Then use "Actions" → "Atoms/Bonds" → "Delete" to delete everything except the ligand.
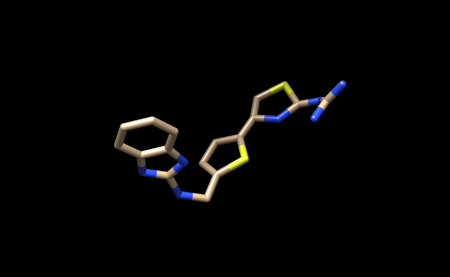
It should look like this.
You can now save only the ligand in a separate .pbd file. We will name this file 1ndv_ligand_only.pdb.
We will also save the ligand in this state as a .mol2 file. We will name this file 1ndv_no_hydrogens_no_charges.mol2
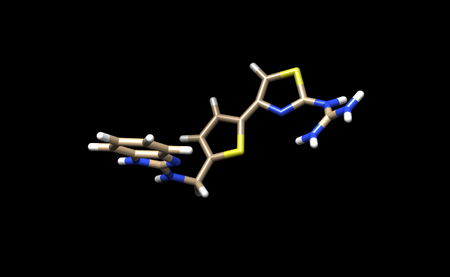
We now need to add hydrogens and charges like we did previously for the protein. It is important to be careful and to cross reference the structure of the ligand in the PDB to ensure that hydrogens are being added in the right places, and that the overall charge of the ligand remains the same. After adding hydrogens, your structure should look similar to this:
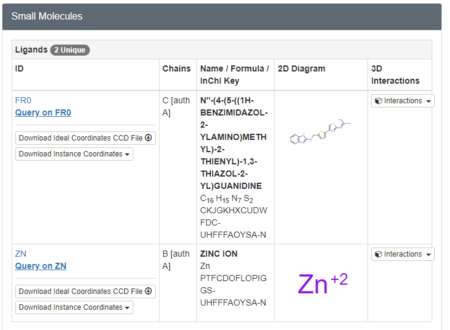
We must now look at the structure in the PDB to ensure Chimera is adding the hydrogens in the proper place. To do this, scroll down on the PDB page of the protein until you see the table labeled "Small Molecules".
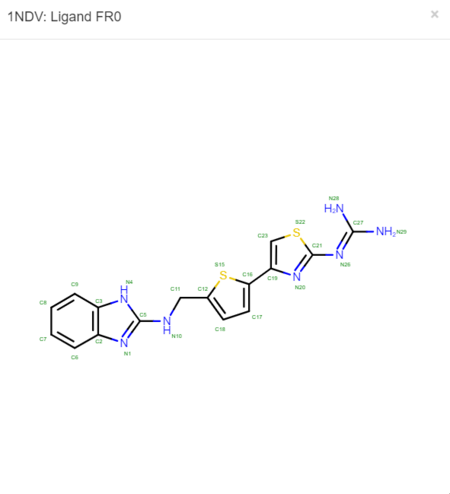
Now click on the "2D Diagram" of the ligand to bring up a larger picture.
It appears that Chimera has added an extra Hydrogen to N26. We need to remove that by simply selecting and deleting that hydrogen. The ligand should now look like this:
We can now add charges to the ligand. When the dialogue box appears, be sure to set the overall charge to 0 for this ligand. With this step complete we can now save a .pdb file and .mol2 with the name 1ndv_ligand_hydrogens_charges.
Upload all four of the .mol2 files created during the protein and ligand preparation process to Seawulf for use with DOCK.
Surface Spheres
DMS file
sphgen
sphere selector
Gridbox
While it is possible to calculate interactions between the ligand and the entire protein surface, this is computationally expensive. In this tutorial we will define a box of interest in the active site of the protein, and DOCK will generate a grid to calculate interaction energies within this box.
Generating the Box
To generate the box we use a DOCK program called showbox. This program is accessed through the command line. First navigate to your 003.gridbox directory and create a new file called showbox.in. Place the following commands into the new file:
Y
8.0
../002.surface_spheres/selected_spheres.sph
1
1ndv.box.pdb
Remember to change "1ndv" to your protein name. This file may need to be modified for your system if you need a larger box. This file currently draws a box of 8.0 angstroms around the selected spheres. To change this, simply change the "8.0" in the input file.
To run this file type:
showbox < showbox.in
If showbox ran successfully you will now have a file named 1ndv.box.pdb in the directory.
Generating the Grid
Now that the box has been defined, we can generate the grid. We do this using a Dock program called grid. Make a new file called grid.in. Place the following commands into the new file:
allow_non_integral_charges                no
  compute_grids                             yes
  grid_spacing                              0.4
  output_molecule                           no
  contact_score                             no
  energy_score                              yes
  energy_cutoff_distance                    9999
  atom_model                                a
  attractive_exponent                       6
  repulsive_exponent                        9
  distance_dielectric                       yes
  dielectric_factor                         4.
  bump_filter                               yes
  bump_overlap                              0.75
  receptor_file                              ../001.structure/1ndv_protein_only_H_charge.mol2
  box_file                                  1ndv.box.pdb
  vdw_definition_file                       /gpfs/projects/AMS536/zzz.programs/dock6.10/parameters/vdw_AMBER_parm99.defn
  score_grid_prefix                         grid
Be sure you are using the receptor_file and box_file for your protein.
Run the file with the following command:
grid -i grid.in -o 1ndvGridInfo.out
This program will take a few minutes to run. If it ran succesfully you will see three new files in your direcotry:
- grid.bmp
- grid.nrg
- 1ndvGridInfo.out
After successfully generating the box and grid, we can begin energy minimization.
Ligand Energy Minimization
DOCK calculates interaction energies between the protein and the ligand. It is important that we first minimize the ligand to a low energy conformer before we dock it into the binding site of the protein to ensure accurate results.
Frist navigate to the 004.minization directory and create a new file called min.in. Place the follow lines in the new file.
conformer_search_type                                        rigid
use_internal_energy                                          yes
internal_energy_rep_exp                                      12
internal_energy_cutoff                                       100.0
ligand_atom_file                                          /gpfs/projects/AMS536/2024/students/group_2_1NDV/dock_screen/001.structure/1ndv_ligand_only_H_charge.mol2
limit_max_ligands                                            no
skip_molecule                                                no
read_mol_solvation                                           no
calculate_rmsd                                               yes
use_rmsd_reference_mol                                       yes
rmsd_reference_filename                                      /gpfs/projects/AMS536/2024/students/group_2_1NDV/dock_screen/001.structure/1ndv_ligand_only_H_charge.mol2
use_database_filter                                          no
orient_ligand                                                no
bump_filter                                                  no
score_molecules                                              yes
contact_score_primary                                        no
grid_score_primary                                           yes
grid_score_rep_rad_scale                                     1
grid_score_vdw_scale                                         1
grid_score_es_scale                                          1
grid_score_grid_prefix                                       /gpfs/projects/AMS536/2024/students/group_2_1NDV/dock_screen/003.gridbox/grid
minimize_ligand                                              yes
simplex_max_iterations                                       1000
simplex_tors_premin_iterations                               0
simplex_max_cycles                                           1
simplex_score_converge                                       0.1
simplex_cycle_converge                                       1.0
simplex_trans_step                                           1.0
simplex_rot_step                                             0.1
simplex_tors_step                                            10.0
simplex_random_seed                                          0
simplex_restraint_min                                        yes
simplex_coefficient_restraint                                10.0
atom_model                                                   all
vdw_defn_file                                                /gpfs/projects/AMS536/zzz.programs/dock6.10/parameters/vdw_AMBER_parm99.defn
flex_defn_file                                               /gpfs/projects/AMS536/zzz.programs/dock6.10/parameters/flex.defn
flex_drive_file                                              /gpfs/projects/AMS536/zzz.programs/dock6.10/parameters/flex_drive.tbl
ligand_outfile_prefix                                        1ndv.lig.min
write_orientations                                           no
num_scored_conformers                                        1
rank_ligands                                                 no
Now run the file with the following command:
dock6 -i min.in -o min.out
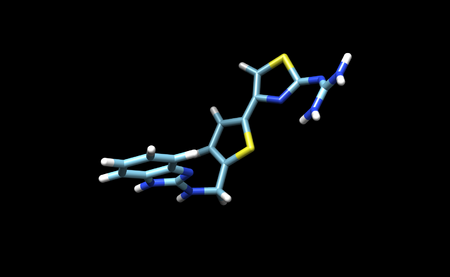
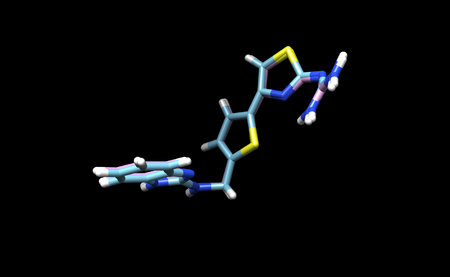
If the program ran successfully you will see a 1ndv.lig.min.mol2 file.
Save this file to your local computer and open it in Chimera with the original ligand file. You will see that DOCK has made very slight changes to the strucutre.
