2023 Denovo tutorial 2 with PDBID 3WZE
Introduction
This tutorial is a continuation of the virtual screening tutorial. In this tutorial, we'll continue to work with the receptor and ligand in PDB 3WZE, and we'll attempt to generate new ligands for the receptor using three kinds of de novo design: de novo refinement, focused de novo design, and generic de novo design.
De novo can be directly translated as "of new", but a more deft translation might be "from the beginning" or "from scratch". This method of ligand generation involves procedurally generating a ligand using algorithms within programs like DOCK, and is typically used to build entirely new ligands for proteins by building molecules outwards from an initial anchor one moiety at a time.
Generic de novo design best matches the prior description, in which a pre-selected or random anchor is positioned within the active site of the receptor, and then built outwards in a number of layers occupied by various sampled moieties. Focused de novo design is much like generic de novo design, except that the pool of sampled moieties is curtailed to suit the needs of the researcher. Finally, de novo refinement is when one begins with an already discovered ligand, then deletes some of the molecule and replaces it with a dummy atom, effectively using the remainder of the ligand as the anchor for the de novo design algorithms to modify.
Directories
Make new directories for de novo design:
 mkdir 009_denovo_generic
 mkdir 010_denovo_refine
 mkdir 011_denovo_focused
Generic De Novo Design
In this tutorial, we'll use the generic fragment library distributed with DOCK 6.10, and we won't use a user-specified anchor either. Thus, DOCK will build new ligands for our receptor from scratch.
1. Bring the grid nrg and bmp files for 3WZE's receptor to your current directory. These files are all that you'll need for a generic de novo design run performed within the 3WZE receptor's active site.
2. Type "touch 3WZE_generic.in" to make a blank file.
3. Type "dock6 -i 3WZE_generic.in" to fill out DOCK's question tree and generate an input file. Use the input file below as a guide for how to answer DOCK's questions:
 conformer_search_type                                        denovo
 dn_fraglib_scaffold_file
/gpfs/projects/AMS536/zzz.programs/dock6.10/parameters/fraglib_scaffold.mol2
 dn_fraglib_linker_file                                       /gpfs/projects/AMS536/zzz.programs/dock6.10/parameters/fraglib_linker.mol2
 dn_fraglib_sidechain_file                                    /gpfs/projects/AMS536/zzz.programs/dock6.10/parameters/fraglib_sidechain.mol2
 dn_user_specified_anchor                                     no
 dn_torenv_table                                              /gpfs/projects/AMS536/zzz.programs/dock6.10/parameters/fraglib_torenv.dat
 dn_name_identifier                                           3WZE_generic
 dn_sampling_method                                           graph
 dn_graph_max_picks                                           30
 dn_graph_breadth                                             3
 dn_graph_depth                                               2
 dn_graph_temperature                                         100.0
 dn_pruning_conformer_score_cutoff                            100.0
 dn_pruning_conformer_score_scaling_factor                    2.0
 dn_pruning_clustering_cutoff                                 100.0
 dn_mol_wt_cutoff_type                                        soft
 dn_upper_constraint_mol_wt                                   550.0
 dn_lower_constraint_mol_wt                                   0.0
 dn_mol_wt_std_dev                                            35.0
 dn_constraint_rot_bon                                        15
 dn_constraint_formal_charge                                  2.0
 dn_heur_unmatched_num                                        1
 dn_heur_matched_rmsd                                         2.0
 dn_unique_anchors                                            1
 dn_max_grow_layers                                           9
 dn_max_root_size                                             25
 dn_max_layer_size                                            25
 dn_max_current_aps                                           5
 dn_max_scaffolds_per_layer                                   1
 dn_write_checkpoints                                         yes
 dn_write_prune_dump                                          no
 dn_write_orients                                             no
 dn_write_growth_trees                                        no
 dn_output_prefix                                             3WZE_generic
 use_internal_energy                                          yes
 internal_energy_rep_exp                                      12
 internal_energy_cutoff                                       100.0
 use_database_filter                                          no
 orient_ligand                                                yes
 automated_matching                                           yes
 receptor_site_file                                           3WZE_spheres.sph
 max_orientations                                             1000
 critical_points                                              no
 chemical_matching                                            no
 use_ligand_spheres                                           no
 bump_filter                                                  yes
 bump_grid_prefix                                             grid
 max_bumps_anchor                                             2
 max_bumps_growth                                             2
 score_molecules                                              yes
 contact_score_primary                                        no
 grid_score_primary                                           yes
 grid_score_rep_rad_scale                                     1
 grid_score_vdw_scale                                         1
 grid_score_es_scale                                          1
 grid_score_grid_prefix                                       grid
 minimize_ligand                                              yes
 minimize_anchor                                              yes
 minimize_flexible_growth                                     yes
 use_advanced_simplex_parameters                              no
 simplex_max_cycles                                           1
 simplex_score_converge                                       0.1
 simplex_cycle_converge                                       1.0
 simplex_trans_step                                           1.0
 simplex_rot_step                                             0.1
 simplex_tors_step                                            10.0
 simplex_anchor_max_iterations                                500
 simplex_grow_max_iterations                                  250
 simplex_grow_tors_premin_iterations                          0
 simplex_random_seed                                          0
 simplex_restraint_min                                        no
 atom_model                                                   all
 vdw_defn_file                                                /gpfs/projects/AMS536/zzz.programs/dock6.10/parameters/vdw_de_novo.defn
 flex_defn_file                                               /gpfs/projects/AMS536/zzz.programs/dock6.10/parameters/flex.defn
 flex_drive_file                                              /gpfs/projects/AMS536/zzz.programs/dock6.10/parameters/flex_drive.tbl
4. Terminate the run with control c, then type "nano 3WZE_generic.sh". We're going to run this job on the cluster because it will be too computationally costly for the head node.
5. Copy the following into the file:
 #!/bin/bash
 #SBATCH --job-name=3WZE_generic
 #SBATCH --ntasks-per-node=24
 #SBATCH --nodes=1
 #SBATCH --time=48:00:00
 #SBATCH -p long-24core
 dock6 -i 3WZE_generic.in
6. Type "sbatch 3WZE_generic.sh" to start the de novo run on the cluster. The job will probably take 1-2 hours to complete.
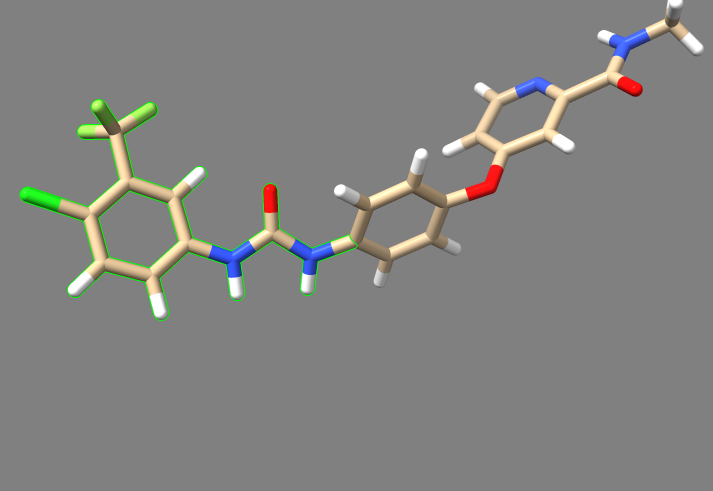
7. Move the "3WZE_generic.denovo_build.mol2" file to your local machine, and either open Chimera and use the viewdock command to open it, or open it in ChimeraX and type "viewdock". There should be approximately 700 ligands produced, and the one with the lowest grid score from our run is shown below:
Rescoring the Outputs
The new ligands generated by this de novo' run have an assocaited grid score to judge their efficacy in binding to the receptor they were designed for, but each ligand can still be energy minimized by rigid docking to arrive at a more accurate estimate of their ability to bind.
1. Type "touch 3WZE_min.in"
2. Type "dock6 -i 3WZE_min.in" and answer the question tree using the following input file as a guide:
 conformer_search_type                                        rigid
 use_internal_energy                                          yes
 internal_energy_rep_exp                                      12
 internal_energy_cutoff                                       100.0
 ligand_atom_file                                             3WZE_generic.denovo_build.mol2
 limit_max_ligands                                            no
 skip_molecule                                                no
 read_mol_solvation                                           no
 calculate_rmsd                                               no
 use_database_filter                                          no
 orient_ligand                                                yes
 automated_matching                                           yes
 receptor_site_file                                           3WZE_sphere.sph
 max_orientations                                             1000
 critical_points                                              no
 chemical_matching                                            no
 use_ligand_spheres                                           no
 bump_filter                                                  yes
 bump_grid_prefix                                             grid
 max_bumps_anchor                                             2
 max_bumps_growth                                             2
 score_molecules                                              yes
 contact_score_primary                                        no
 grid_score_primary                                           yes
 grid_score_rep_rad_scale                                     1
 grid_score_vdw_scale                                         1
 grid_score_es_scale                                          1
 grid_score_grid_prefix                                       grid
 minimize_ligand                                              yes
 simplex_max_iterations                                       1000
 simplex_tors_premin_iterations                               0
 simplex_max_cycles                                           1
 simplex_score_converge                                       0.1
 simplex_cycle_converge                                       1.0
 simplex_trans_step                                           1.0
 simplex_rot_step                                             0.1
 simplex_tors_step                                            10.0
 simplex_random_seed                                          0
 simplex_restraint_min                                        no
 atom_model                                                   all
 vdw_defn_file                                                /gpfs/projects/AMS536/zzz.programs/dock6.10/parameters/vdw_de_novo.defn
 flex_defn_file                                               /gpfs/projects/AMS536/zzz.programs/dock6.10/parameters/flex.defn
 flex_drive_file                                              /gpfs/projects/AMS536/zzz.programs/dock6.10/parameters/flex_drive.tbl
 ligand_outfile_prefix                                        3WZE_generic_min
 write_orientations                                           no
 num_scored_conformers                                        1
 rank_ligands                                                 no
3. Bring the "3WZE_generic_min_scored.mol2" file, which contains the minimized molecules to your local machine, and open it with Chimera or ChimeraX as described previously. Shown below is the ligand with the lowest continuous score after energy minmization:
If you compare this ligand to the best scored ligand from the generic de novo design, you'll see that this one actually has a few moieties that are different, suggesting that this molecule is truly best suited for the receptor's binding site, and the prior molecule was only scored highest because all 700 ligands hadn't been energy minimized.
De Novo Refinement
Ligand Preparation
1. Open the final, energy minimized ligand mol2 file which was used for the 3WZE virtual screen tutorial, and also open the final receptor mol2 file that was used in that screen. Either Chimera or ChimeraX can be used to open the files. As long as no translations or rotations have occurred during the virtual screen process, the ligand should still be in its native orientation within the receptor's active site, as depicted by the original 3WZE pdb file.
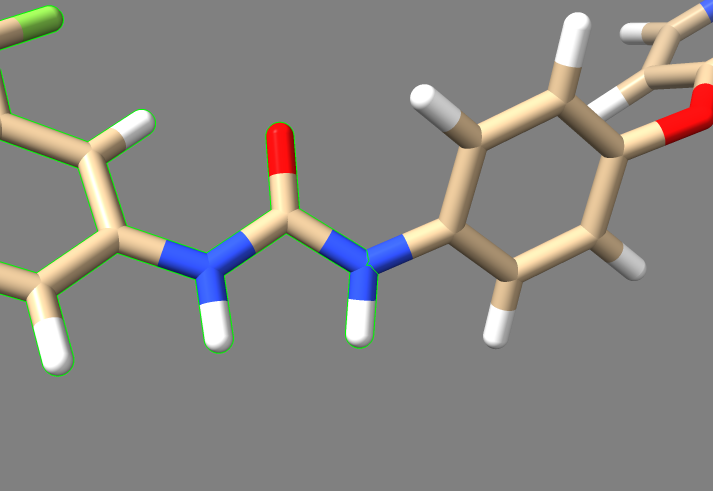
2. Examine the binding pocket of the receptor, and choose a part of the 3WZE ligand that faces towards the interior of the binding pocket. Parts of the ligand that are innermost to the receptor make for the best parts to delete because they tend to have the most potential interactions with the protein, allowing the various groups tested in de novo design to have a better chance of interacting with a group on the protein. Choosing a part of the ligand to delete which faces the cytosol or the channel leading to the cytosol will be less likely to yield new ligands that can bind tightly to the interior of the receptor. To help recognize good sites for deletion, it's a good idea to show sidechains and hbonds, which can allow you to see which parts of the ligand are interacting with the protein.
In this image, one can see the ligand sorafinib, and also the two hbonds that it forms with the nearby glutamic acid residue 71. It also forms an hbond with the backbone of the receptor using its amide oxygen. Based on this, we'll truncate those two amides and the entire aromatic ring closest to the camera. The camera is positioned to look from the side of the receptor where the binding pocket is deepest, so deleting everything closer than those amides will delete the parts of the ligand which are innermost.
3. Select and delete the receptor. Now that we've identified which part of the ligand to remove, we don't need the receptor anymore.
4. Orient the ligand so that the area you wish to delete is easy to see. Hold control down on your keyboard, then click and drag to cover the area. This should select the area.
5. Now deselect the first atom in the highlighted area. We're going to keep this atom so that it can be changed into a dummy atom. This style of de novo design requires a dummy atom to tell DOCK where to try putting new moieties, and it's easier to keep this nitrogen and change it into a dummy than it is to delete the whole selected area then manually attach a dummy.
6. Delete the selected area using Actions->Atoms/Bonds->Delete. Alternatively, if you're using ChimeraX, simply type "delete sel" into the command line.
You should end up with a molecule that looks like this. Hover your mouse over that nitrogen we spared from deletion, and note its number. In this case the nitrogen is N14.
7. Save this truncated molecule as a mol2 file.
8. Open the mol2 file in a text editor on desktop, or with a command like "nano" from the command line.
9. Find N14, and change the atom type to "Du1". Also change its bond type to "Du". We're only adding a single dummy atom to the anchor in this tutorial because we're trying to modify only one part of an exissting ligand, but bear in mind that one could add any number of dummy atoms to an input ligand and DOCK will try adding moieties to each one.
10. To test whether the mol2 modification worked, open the mol2 with Chimera or ChimeraX. The dummy atom should appear purple or grey, respectively.
(Note that this image was taken with ChimeraX)
11. Now that our ligand is prepared, we can move it to Seawulf where we can perform the actual de novo refinement. For information on how to move a file to Seawulf using the scp command, see the 3WZE virtual screen tutorial.
Running the Refinement
As with the virtual screen, DOCK can be run with an input file, the text of which will be shown below. However, it's a good idea to make your own input file rather than copying what is written here. That way, you can get a sense of what parameters can be adjusted before a de novo refinement run.
1. In the command line in Seawulf, type
touch de_novo_refine.in
Unlike "nano" or "vi", the "touch" command will allow you to make a blank file.
2. To go through the process of answering DOCK's many questions about your run, and to subsequently generate an input file, type
dock6 -i de_novo_refine.in
3. Answer the questions. Our input file is as follows:
 conformer_search_type                                        denovo
 dn_fraglib_scaffold_file                                     /gpfs/projects/AMS536/zzz.programs/dock6.10/parameters/fraglib_scaffold.mol2
 dn_fraglib_linker_file                                       /gpfs/projects/AMS536/zzz.programs/dock6.10/parameters/fraglib_linker.mol2
 dn_fraglib_sidechain_file                                    /gpfs/projects/AMS536/zzz.programs/dock6.10/parameters/fraglib_sidechain.mol2
 dn_user_specified_anchor                                     yes
 dn_fraglib_anchor_file                                       Chopped_ligand_for_denovo.mol2
 dn_torenv_table                                              /gpfs/projects/AMS536/zzz.programs/dock6.10/parameters/fraglib_torenv.dat
 dn_name_identifier                                           3WZE_refine
 dn_sampling_method                                           graph
 dn_graph_max_picks                                           30
 dn_graph_breadth                                             3
 dn_graph_depth                                               2
 dn_graph_temperature                                         100.0
 dn_pruning_conformer_score_cutoff                            100.0
 dn_pruning_conformer_score_scaling_factor                    2.0
 dn_pruning_clustering_cutoff                                 100.0
 dn_mol_wt_cutoff_type                                        soft
 dn_upper_constraint_mol_wt                                   1000
 dn_lower_constraint_mol_wt                                   0.0
 dn_mol_wt_std_dev                                            35.0
 dn_constraint_rot_bon                                        15
 dn_constraint_formal_charge                                  5
 dn_heur_unmatched_num                                        1
 dn_heur_matched_rmsd                                         2.0
 dn_unique_anchors                                            1
 dn_max_grow_layers                                           1
 dn_max_root_size                                             25
 dn_max_layer_size                                            25
 dn_max_current_aps                                           5
 dn_max_scaffolds_per_layer                                   1
 dn_write_checkpoints                                         yes
 dn_write_prune_dump                                          no
 dn_write_orients                                             no
 dn_write_growth_trees                                        no
 dn_output_prefix                                             3WZE_refine
 use_internal_energy                                          yes
 internal_energy_rep_exp                                      12
 internal_energy_cutoff                                       100.0
 use_database_filter                                          no
 orient_ligand                                                no
 bump_filter                                                  no
 score_molecules                                              yes
 contact_score_primary                                        no
 grid_score_primary                                           yes
 grid_score_rep_rad_scale                                     1
 grid_score_vdw_scale                                         1
 grid_score_es_scale                                          1
 grid_score_grid_prefix                                       grid
 minimize_ligand                                              yes
 minimize_anchor                                              no
 minimize_flexible_growth                                     yes
 use_advanced_simplex_parameters                              no
 simplex_max_cycles                                           1
 simplex_score_converge                                       0.1
 simplex_cycle_converge                                       1.0
 simplex_trans_step                                           1.0
 simplex_rot_step                                             0.1
 simplex_tors_step                                            10.0
 simplex_grow_max_iterations                                  250
 simplex_grow_tors_premin_iterations                          0
 simplex_random_seed                                          0
 simplex_restraint_min                                        yes
 simplex_coefficient_restraint                                10.0
 atom_model                                                   all
 vdw_defn_file                                                /gpfs/projects/AMS536/zzz.programs/dock6.10/parameters/vdw_de_novo.defn
 flex_defn_file                                               /gpfs/projects/AMS536/zzz.programs/dock6.10/parameters/flex.defn
 flex_drive_file                                              /gpfs/projects/AMS536/zzz.programs/dock6.10/parameters/flex_drive.tbl
Notes on some of the parameters:
-dn_user_specified_anchor can be set to "no" if one wishes to run a de novo design run in which they do not specify an input anchor with dummy atoms. When set to "no", DOCK 6.10 will use moieties from the fragment libraries as anchors to build out from, allowing for multiple different anchors and orientations to be tried.
-dn_sampling_method can be "graph", "random", or "exhaustive". "graph" will select moieties which are similar to previously selected moieties that improved the grid score, so graph will attempt to bias future moiety selection in a way that promotes improving the ligand. "random" will cause moieties to be selected at random. "exhaustive" will ensure that every possible moiety will be tried at every possible position. Be careful with "exhaustive" though, because it will increase the computation time required in a way proportional to the fragment library size.
-dn_graph_max_picks and dn_num_random_picks (the latter is not shown above) control how many moieties are tried per dummy atom per growth layer.
-dn_max_grow_layers controls how many moieties outwards DOCK will grow your ligand from each dummy atom on the initial anchor. We've only set it to 1 in this refinement tutorial for simplicity, but it can be set higher values. 8 to 9 layers is common for growing ligands from scratch without a set anchor, but the total number of layers that you may want will depend on the goal of the de novo design run.
-minimize_ligand, when set to yes, will attempt to energy minimize the ligand after each moiety selection, in much the same way DOCK 6.10 does so in flexible docking.
-minimize_anchor, when set to yes, will try to energy minimize the anchor before attaching moieties, irrespective of whether the anchor is provided by the user or is chosen randomly. For de novo runs in which the anchor is part of a ligand that binds in a known orientation, it is best to set this parameter to "no". Otherwise, DOCK 6.10 might alter the orientation of your anchor before attempting to grow it with new moieties, and a resulting molecule might not be reflective of how the ligand normally binds.
-Much like the prior parameter, simplex_restraint_min is useful when running a de novo design with a user-supplied anchor of known orientation. When set to yes, this parameter essentially applies a stretchy tether to the initial anchor, allowing it to deviate from its starting position somewhat for the sake of energy minimization, but also applies a penalty based on increasing RMSD.
4. Run the de novo refinenment in Seawulf using the following command:
dock6 -i de_novo_refine.in -o de_novo_refine.out
This should take a few minutes to complete, and when it does, there should be three new files:
 3WZE_refine.anchor_1.root_layer_1.mol2
 3WZE_refine.denovo_build.mol2
 de_novo_refine.out
Checking the Results
1. Bring the two mol2 files to your local machine
2. If you're using Chimera, open Chimera and use Tools->Surface/Binding Analysis->ViewDock to open 3WZE_refine.denovo_build.mol2. If you're using ChimeraX, open that file, then type "viewdockx" into the command line.
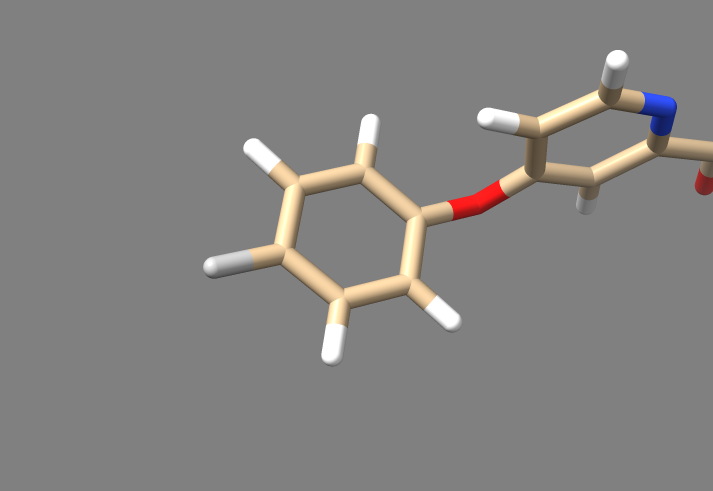
Note that this image was taken from ChimeraX. Also, please disregard that I named my ligand "blooble".
3. Look through the results. Because we set "dn_max_grow_layers" to 1, this means that the dummy atom should only be replaced with a single fragment, and there should be no further fragments appended to the single one added.
For our results, we got 10 new molecules. If we had wanted more molecules, we could have increased the value of "dn_graph_max_picks" from 30 to a higher value. This means that dock would sample more fragments (We only got 10 molecules because 20 of the 30 picked fragments must have somehow been incompatible with the anchor).
If you want every possible new molecule based on the fragement library you're using, you could set "dn_sampling_method" to "exhaustive" instead of "graph".
Focused De Novo Design
Focused de novo design is performed by controlling which moieties can be sampled during the ligand generation process. This is done by generating a fragment library to use instead of the one distributed with DOCK 6.10, and thus controlling the pool of available moieties for DOCK to choose from. Oftentimes the library distributed with DOCK 6.10 is sufficient for most runs, but this methodology can be useful when the generic library lacks a moiety of importance for one's system (such as phosphate), or when the generic library contains moieties that will interact in an undesired way with one's system.
The generation and use of a custom fragment library and the use of the generic fragment library are not mutually exclusive however, and thus this tutorial will also cover how two or more fragment libraries can be combined to make a library containing all of the fragments from both.
Fragment Library Generation
DOCK 6.10 is able to generate a fragment library from an input mol2 file containing one or more ligands.
1. Move the 3WZE final ligand mol2 file to the focused de novo directory. We'll be using this file to generate a fragment library, but bear in mind that mol2 files containing multiple ligands can also be used for library generation (and more typically are).
2. Type "touch frag_gen.in" to make an empty input file for fragment library generation.
3. Type "dock6 -i frag_gen.in" to go through the question tree presented by DOCK. Use the sample input file below as a guide:
 conformer_search_type                                        flex
 write_fragment_libraries                                     yes
 fragment_library_prefix                                      3WZE
 fragment_library_freq_cutoff                                 1
 fragment_library_sort_method                                 freq
 fragment_library_trans_origin                                yes
 use_internal_energy                                          yes
 internal_energy_rep_exp                                      12
 internal_energy_cutoff                                       100.0
 ligand_atom_file                                             3WZE_final_ligand.mol2
 limit_max_ligands                                            no
 skip_molecule                                                no
 read_mol_solvation                                           no
 calculate_rmsd                                               no
 use_database_filter                                          no
 orient_ligand                                                no
 bump_filter                                                  no
 score_molecules                                              no
 atom_model                                                   all
 vdw_defn_file                                                /gpfs/projects/AMS536/zzz.programs/dock6.10/parameters/vdw_de_novo.defn
 flex_defn_file                                               /gpfs/projects/AMS536/zzz.programs/dock6.10/parameters/flex.defn
 flex_drive_file                                              /gpfs/projects/AMS536/zzz.programs/dock6.10/parameters/flex_drive.tbl
 ligand_outfile_prefix                                        trash
 write_orientations                                           no
 num_scored_conformers                                        1
 rank_ligands                                                 no
Notes on input parameters:
-fragment_library_freq_cutoff acts as a sorting mechanism to only allow a fragment into the library if it appears for the specified number of times. When set to 1, this allows any fragment that appears even a single time to be added to the library.
-fragment_library_trans_origin, when set to yes, will translate all fragments in space to a single position, so that when viewed in a program like Chimera or ChimeraX, the user can view the various fragments without having to adjust their camera position each time they switch which fragment that they're looking at.
-ligand_outfile_prefix is set to "trash" because the output ligand file from fragment library generation will be empty, and can be safely discarded.
4. After running this fragment library generation, six new files should be produced:
 3WZE_linker.mol2
 3WZE_rigid.mol2
 3WZE_scaffold.mol2
 3WZE_sidechain.mol2
 3WZE_torenv.dat
 trash_scored.mol2
5. For this particular fragment library, which was produced only from sorafinib, only the linker, sidechain, and torsions file will contain any information, because sorafinib doesn't contain any groups that DOCK can turn into scaffolds or rigid regions.
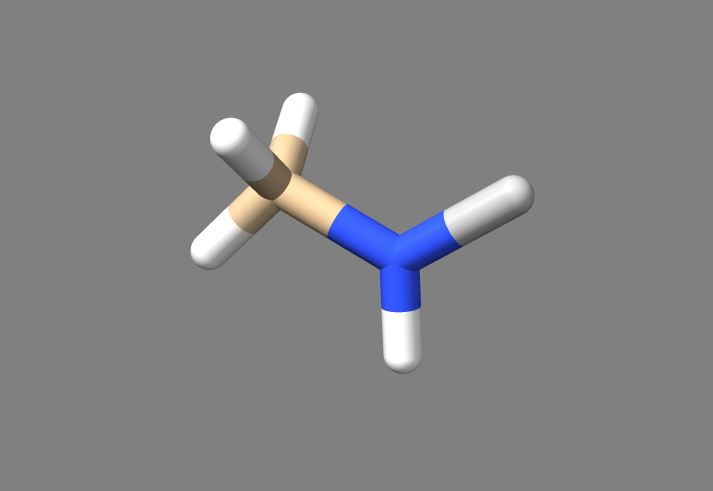
6. Bring the sidechain file to your local machine, and open it with Chimera or ChimeraX. It should contain two sidechains, the first of which should look like the one pictured below:
(Optional) Fragment Library Merging
Sometimes, one might wish to combine multiple fragment libraries, and this tutorial will go over combining a fragment library generated by the user, with the one distributed with DOCK 6.10
1. Find the fraglib_rigid.mol2, fraglib_scaffold.mol2, fraglib_sidechain.mol2, and fraglib_linker.mol2 files in the parameters/ folder within DOCK6.10/
2. Copy them to a the directory where you generated the fragment library for sorafinib.
3. Type "wc -l fraglib_rigid.mol2" to print the number of lines contained within fraglib_rigid.mol2. Repeat the process for the other fraglib files taken from the parameters/ folder. "wc" stands for word count, and the -l argument makes the command count lines in the input file rather than words. You should find the following values:
 6184 fraglib_linker.mol2
 706 fraglib_scaffold.mol2
 10017 fraglib_sidechain.mol2
 10844 fraglib_torenv.dat
4. Type "wc -l *3WZE*" to quickly assess how many lines are in each of the files in the library we generated. The output should look like the following:
 229 3WZE_linker.mol2
 0 3WZE_rigid.mol2
 0 3WZE_scaffold.mol2
 60 3WZE_sidechain.mol2
 6 3WZE_torenv.dat
5. Type "cat *linker* >> combined_fraglib_linker.mol2" to make a linker file combining the linkers in the generic library and the one generated for sorafinib. Do the same command for the scaffold and sidechain files by substituting the word "linker" for the words "scaffold" and "sidechain" respectively. The "cat" command reads a file and prints its contents, The asterisks are wildcards that ensure that, regardless of the other characters in the filenames, any file with the typed word is taken as an input, the ">>" takes the output of the cat command and adds it to the end of a specified file, which is the empty "combined_fraglib_linker.mol2" in this case.
5. Locate the "combine_torenv.py" file in the dock6.10/bin/ directory. Copy it over to the directory in which you're generating the combined fragment libraries.
6. Type "python combine_torenv.py fraglib_torenv.dat 3WZE_torenv.dat". This python script will combine the two torsion files, which cannot simply be combined by appending the contents of two files together as was done in step 4.
7. To check whether the process was successful, type "wc -l combined_fraglib_*" and repeat the process for the "full_fraglib_torenv.dat" file". Because our library generated from sorafinib only had linkers, sidechains, and torsions, we expect to only see an increase in the number of lines in the full_fraglib_torenv.dat, full_fraglib_linker.mol2, and combined_fraglib_sidechain.mol2 files:
 6413 combined_fraglib_linker.mol2
 0 combined_fraglib_rigid.mol2
 6464 combined_fraglib_scaffold.mol2
 10077 combined_fraglib_sidechain.mol2
 10850 full_fraglib.dat
The lines in these files are the sums of the files we combined, so this verifies that our fragment libraries have been successfully combined.
Running the Focused De Novo Design
For this tutorial, we'll use the same 3WZE anchor that we generated for de novo refinement, and we'll use the fragment library that we generated from sorafinib.
1. Move the 3WZE anchor mol2 file, and all of the 3WZE fragment library files to a new directory.
2. Type "touch 3WZE_focused.in" to generate a blank file
3. Type "dock6 -i 3WZE_focused.in" to go through DOCK's question tree. Use the following input file as a guide for how the questions should be answered:
 conformer_search_type                                        denovo
 dn_fraglib_scaffold_file                                     3WZE_scaffold.mol2
 dn_fraglib_linker_file                                       3WZE_linker.mol2
 dn_fraglib_sidechain_file                                    3WZE_sidechain.mol2
 dn_user_specified_anchor                                     yes
 dn_fraglib_anchor_file                                       Chopped_ligand_for_denovo.mol2
 dn_torenv_table                                              3WZE_torenv.dat
 dn_name_identifier                                           focused_3WZE
 dn_sampling_method                                           graph
 dn_graph_max_picks                                           30
 dn_graph_breadth                                             3
 dn_graph_depth                                               2
 dn_graph_temperature                                         100.0
 dn_pruning_conformer_score_cutoff                            100.0
 dn_pruning_conformer_score_scaling_factor                    2.0
 dn_pruning_clustering_cutoff                                 100.0
 dn_mol_wt_cutoff_type                                        soft
 dn_upper_constraint_mol_wt                                   550.0
 dn_lower_constraint_mol_wt                                   0.0
 dn_mol_wt_std_dev                                            35.0
 dn_constraint_rot_bon                                        15
 dn_constraint_formal_charge                                  2.0
 dn_heur_unmatched_num                                        1
 dn_heur_matched_rmsd                                         2.0
 dn_unique_anchors                                            1
 dn_max_grow_layers                                           1
 dn_max_root_size                                             25
 dn_max_layer_size                                            25
 dn_max_current_aps                                           5
 dn_max_scaffolds_per_layer                                   1
 dn_write_checkpoints                                         yes
 dn_write_prune_dump                                          no
 dn_write_orients                                             no
 dn_write_growth_trees                                        no
 dn_output_prefix                                             3WZE_focused
 use_internal_energy                                          yes
 internal_energy_rep_exp                                      12
 internal_energy_cutoff                                       100.0
 use_database_filter                                          no
 orient_ligand                                                no
 bump_filter                                                  no
 score_molecules                                              yes
 contact_score_primary                                        no
 grid_score_primary                                           yes
 grid_score_rep_rad_scale                                     1
 grid_score_vdw_scale                                         1
 grid_score_es_scale                                          1
 grid_score_grid_prefix                                       grid
 minimize_ligand                                              no
 atom_model                                                   all
 vdw_defn_file                                                /gpfs/projects/AMS536/zzz.programs/dock6.10/parameters/vdw_de_novo.defn
 flex_defn_file                                               /gpfs/projects/AMS536/zzz.programs/dock6.10/parameters/flex.defn
 flex_drive_file                                              /gpfs/projects/AMS536/zzz.programs/dock6.10/parameters/flex_drive.tbl
Note that this process doesn't need to be performed with the anchor we designed for the refinement run. It was only used in this case because it will be easy to visualize the resulting molecules and examine which moieties were added to the single dummy atom.
4. Import the 3WZE_focused.denovo_build.mol2 file to your local machine, and either use Chimera's viewdock command to open it, or open it in ChimeraX and type "viewdockx". There should be 1 molecule in the file, and it should look like the following:
In using sorafinib to generate the library and acnhor, and in only allowing a single growth layer, we've effectively reproduced the original ligand. Obviously, this is not the intended purpose of focused de novo design, but the lack of numerous output molecules demonstrates that we have successfully performed a de novo design run with our custom library, otherwise moieties from DOCK 6.10's massive library would have been used to generate numerous ligands, as we observed in the de novo' refinement.


