Difference between revisions of "2023 Denovo tutorial 2 with PDBID 3WZE"
Stonybrook (talk | contribs) (→Ligand Preparation) |
Stonybrook (talk | contribs) (→Ligand Preparation) |
||
| Line 52: | Line 52: | ||
(Note that this image was taken with ChimeraX) | (Note that this image was taken with ChimeraX) | ||
| + | |||
| + | 11. Now that our ligand is prepared, we can move it to Seawulf where we can perform the actual ''de novo'' refinement. | ||
='''Focused ''De Novo'' Design'''= | ='''Focused ''De Novo'' Design'''= | ||
='''Generic ''De Novo'' Design'''= | ='''Generic ''De Novo'' Design'''= | ||
Revision as of 19:54, 18 March 2023
Contents
Introduction
This tutorial is a continuation of the virtual screening tutorial. In this tutorial, we'll continue to work with the receptor and ligand in PDB 3WZE, and we'll attempt to generate new ligands for the receptor using three kinds of de novo design: de novo refinement, focused de novo design, and generic de novo design.
De novo can be directly translated as "of new", but a more deft translation might be "from the beginning" or "from scratch". This method of ligand generation involves procedurally generating a a ligand using algorithms within programs like DOCK, and is typically used to build entirely new ligands for proteins by building molecules outwards from an initial anchor one moiety at a time.
Generic de novo design best matches the prior description, in which a pre-selected or random anchor is positioned within the active site of the receptor, and then built outwards in a number of layers occupied by various sampled moieties. Focused de novo design is much like generic de novo design, except that the pool of sampled moieties is curtailed to suit the needs of the researcher. Finally, de novo refinement is when one begins with an already discovered ligand, then deletes some of the molecule and replaces it with a dummy atom, effectively using the remainder of the ligand as the anchor for the de novo design algorithms to modify.
Directories
Make a new directory for de novo refinement:
mkdir 009_denovo
De Novo Refinement
Ligand Preparation
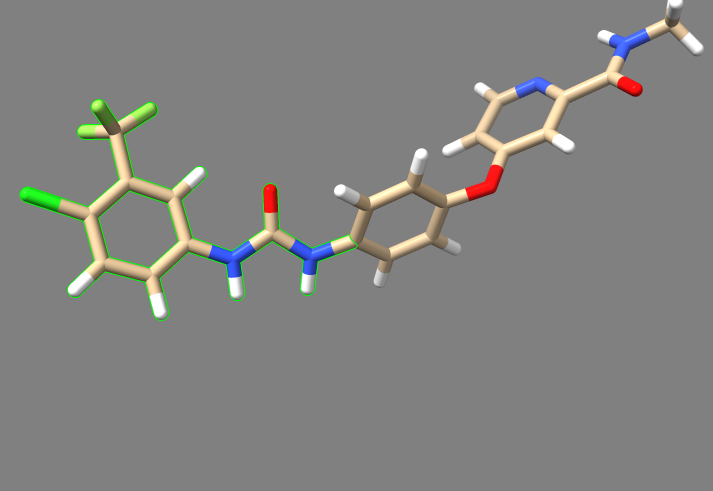
1. Open the final, energy minimized ligand mol2 file which was used for the virtual screen tutorial, and also open the final receptor mol2 file that was used in that screen. Either Chimera or ChimeraX can be used to open the files. As long as no translations or rotations have occurred during the virtual screen process, the ligand should still be in its native orientation within the receptor's active site, as depicted by the original 3WZE pdb file.
2. Examine the binding pocket of the receptor, and choose a part of the 3WZE ligand that faces towards the interior of the binding pocket. Parts of the ligand that are innermost to the receptor make for the best parts to delete because they tend to have the most potential interactions with the protein, allowing the various groups tested in de novo design to have a better chance of interacting with a group on the protein. Choosing a part of the ligand to delete which faces the cytosol or the channel leading to the cytosol will be less likely to yield new ligands that can bind tightly to the interior of the receptor. To help recognize good sites for deletion, it's a good idea to show sidechains and hbonds, which can allow you to see which parts of the ligand are interacting with the protein.
In this image, one can see the ligand sorafinib, and also the two hbonds that it forms with the nearby glutamic acid residue 71. It also forms an hbond with the backbone of the receptor using its amide oxygen. Based on this, we'll truncate those two amides and the entire aromatic ring closest to the camera. The camera is positioned to look from the side of the receptor where the binding pocket is deepest, so deleting everything closer than those amides will delete the parts of the ligand which are innermost.
3. Select and hide the receptor.
4. Orient the ligand so that the area you wish to delete is easy to see. Hold control down on your keyboard, then click and drag to cover the area. This should select the area.
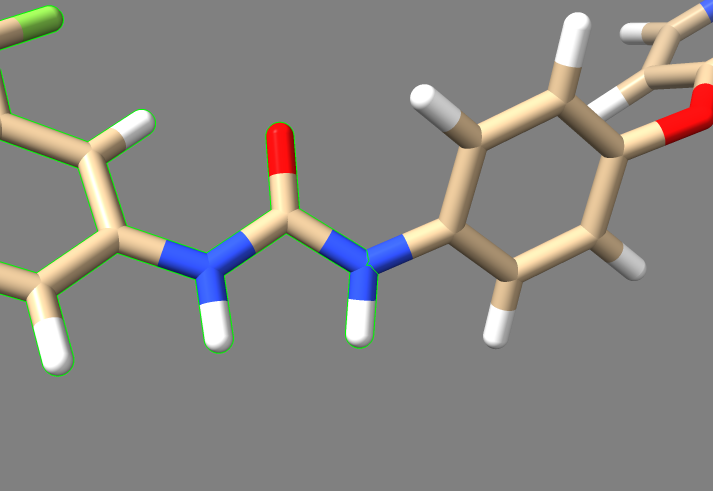
5. Now deselect the first atom in the highlighted area. We're going to keep this atom so that it can be changed into a dummy atom. This style of de novo design requires a dummy atom to tell DOCK where to try putting new moieties, and it's easier to keep this nitrogen and change it into a dummy than it is to delete the whole selected area then manually attach a dummy.
6. Delete the selected area using Actions->Atoms/Bonds->Delete. Alternatively, if you're using ChimeraX, simply type "delete sel" into the command line.
You should end up with a molecule that looks like this. Hover your mouse over that nitrogen we spared from deletion, and note its number. In this case the nitrogen is N14.
7. Save this truncated molecule as a mol2 file.
8. Open the mol2 file in a text editor on desktop, or with a command like "nano" from the command line.
9. Find N14, and change the atom type to "Du1". Also change its bond type to "Du".
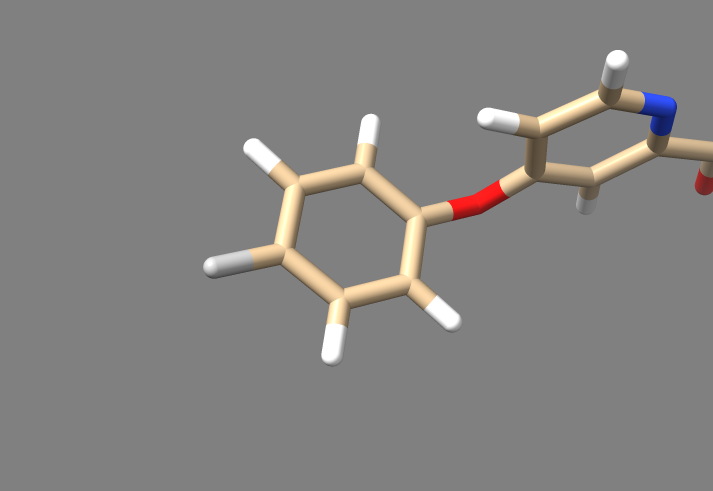
10. To test whether the mol2 modification worked, open the mol2 with Chimera or ChimeraX. The dummy atom should appear purple or grey, respectively.
(Note that this image was taken with ChimeraX)
11. Now that our ligand is prepared, we can move it to Seawulf where we can perform the actual de novo refinement.


